Sell Handmade Jewelry Smarter: Pricing by Grams
Learn a repeatable way to estimate jewelry weight (especially chains and tiny findings), convert grams to ounces, and plug that number into a simple pricing formula that covers materials, labor, and profit. Includes practical tips for gold-filled vs plated, sterling silver weight-by-length, and accuracy checks when you do not have a physical scale.
Pricing handmade jewelry online can feel squishy when you cannot reliably weigh a chain, a clasp, and five jump rings. If your gram estimate is off, your margin takes the hit. In this guide, you will learn a practical workflow to estimate grams from photos, sanity-check the result, convert to ounces when you need to, and plug the number into a pricing formula that protects your profit. Expect consistent quoting, not assay-level precision.
Why pricing by grams protects your profit
If you price metal jewelry without a weight habit, you will undercharge on chains and overcharge on lightweight pieces. Chains quietly eat profit because thickness changes cost, even when two finished necklaces look almost identical on a product photo. Lightweight pieces can flip the problem the other way: you might charge a “chain price” for a tiny 1.2 g charm-on-a-fine-chain, then lose the sale to someone pricing more fairly. Grams keep you honest because metal is literally priced by how much of it you used, not by how shiny it looks. Once you start thinking in grams, your pricing stops feeling like guesswork and starts behaving like a recipe that comes out the same every time.
Weight-based pricing matters most any time your materials are mostly metal. That includes chains (curb, figaro, rope, paperclip), stacked components (multiple rings, layered connectors, double-chain designs), and heavier pendants where the “centerpiece” is the cost. It also matters for shipping, since an extra 3 g might not sound like much, but it stacks with packaging, boxes, and inserts, and it can push a parcel into a different postage tier. If you want the workflow to be repeatable, use three steps: estimate grams (from a quick photo-based check or a reference piece), validate grams (spot-check on a real scale or confirm with supplier specs), then price from a formula. If you ship a lot, pair that with DIM weight USPS postage basics so you protect margin on both product and delivery.
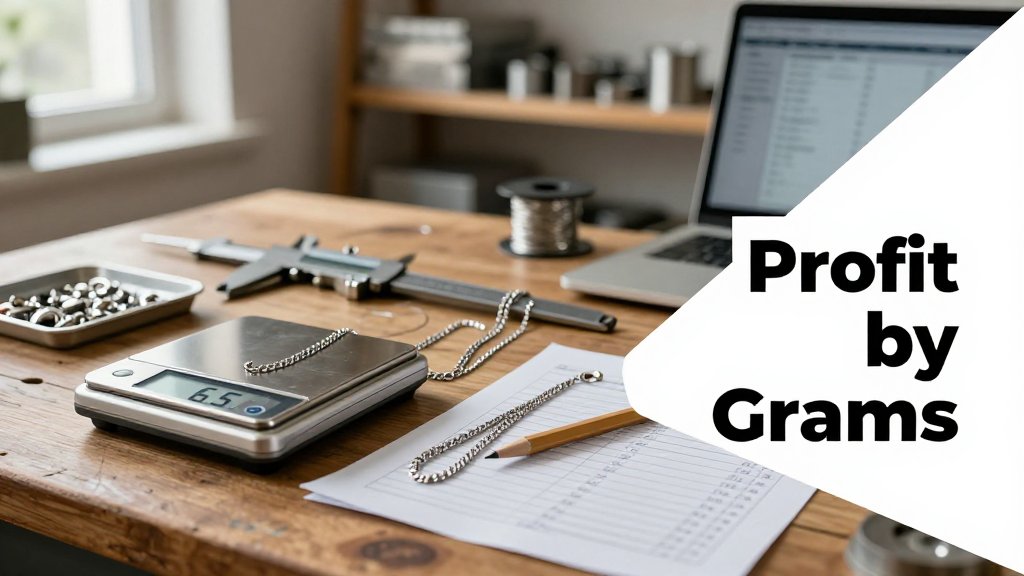
Here is a fast reality check using sterling chain weights that are close enough to fool your eye. Say Necklace A uses a 3.8 g sterling chain, and Necklace B uses a 6.5 g sterling chain. That is only 2.7 g difference, but it is not “free.” If your wholesale chain cost averages $1.60 per gram, Necklace A’s chain metal is about $6.08 while Necklace B’s is about $10.40. Add the same clasp and findings ($2.50), packaging ($1.00), and labor allocation ($12.00), and you get total costs of $21.58 versus $25.90. If you sell both at a flat $45, your profit drops from $23.42 to $19.10. That is $4.32 per sale, and it shows up immediately when you make ten pieces in a batch.
The common mistake: pricing chains like they are beads
Picture two necklaces laid flat for photos: both are 18 inches, both have the same small moon charm, and both are styled on the same linen background. You list them at $38 each because they “look the same.” After a few orders, you realize one chain is a dainty 1.3 mm cable and the other is a chunkier 2.0 mm curb, and the curb version is 2 to 3 g heavier depending on the clasp. That extra metal is real cost, but your price did not move. If your chain supplier charges you $9.00 for the lighter chain and $13.50 for the heavier one, you just gave away $4.50 of margin on every curb necklace without noticing. Rule of thumb you can repeat while you design: “If the metal is the product, grams are the cost driver.”
Chains are also the easiest place to build a simple pricing system because they are consistent. Start by weighing one finished inch, or better, weigh a 10 inch sample and divide by 10 to reduce rounding errors. Write down “grams per inch” for each chain type and thickness you carry, then you can price new designs without pulling out a scale every time. For example, if your favorite sterling cable chain is 0.20 g per inch, an 18 inch necklace is about 3.6 g before you add a clasp. A thicker chain at 0.36 g per inch comes out closer to 6.5 g at the same length, which is the exact difference that quietly steals profit. Then your price formula stays stable: (grams x material rate) + findings + labor + overhead, and you can choose a markup that fits your shop.
Build a weight habit: estimate grams from a photo, confirm one out of every five pieces on a real scale, then update your price sheet. You will stop guessing, and your profit becomes repeatable.
Gold-filled vs plated weight: what weight can and cannot tell you
Weight is useful for pricing, but it cannot prove authenticity. Gold-filled material is made by bonding a thicker layer of gold to a base metal (often brass), while gold-plated is a very thin coating applied over a base. Both can look similar in photos, and both can be listed with confusing language, so grams alone will not tell you “this is real gold-filled.” What weight can do is keep your costs grounded in reality and help you ask better sourcing questions. In the US, the term “gold filled” is tied to specific marketing guidance, including the long-standing 1/20 weight ratio concept in the FTC gold-filled standard. That matters because reputable suppliers usually have measurable specs, not vague descriptions.
A practical sourcing tip that makes pricing painless: ask for grams per inch (or grams per meter) for every chain you buy. Then you can quote consistently, even if you cut custom lengths. Example: if a gold-filled chain is 0.42 g per inch, a 16 inch necklace is about 6.7 g of chain, and an 18 inch is about 7.6 g, before clasps and jump rings. That lets you explain price differences without getting defensive, because you are charging for extra material, not “charging more because it is longer.” Weight can also flag listings that feel off. If a seller claims a thick 24 inch chain but it weighs less than your fine 16 inch chain, that does not automatically prove fraud, but it does tell you to pause, request specs, and compare apples to apples before you commit your money.
Estimate chain and findings weight at home
Chains and findings are where jewelry pricing gets slippery, because tiny parts add up fast. A lobster clasp might only be around 0.4 g to 0.9 g, a pair of ear wires can land near 0.8 g to 1.6 g depending on thickness, and a few jump rings can quietly tack on another 0.1 g to 0.4 g. If your chain estimate is off by even 0.5 g, that can be a real material difference once you multiply it across 20 listings. The goal at home is not lab precision. It is a repeatable estimate you can defend, so online pricing stays consistent and you are not undercharging for “small stuff.”
A photo-based workflow works best when you treat it like baking by weight: same setup, same process, same rounding rules every time. For chains, straighten the piece so the links are not piled on themselves. For findings, spread them with a little space between parts so the app can see edges. Use a plain background (white printer paper is perfect), bright window light, and avoid glossy countertops that create highlights. If you use Scale for Grams on iOS, the biggest accuracy boost usually comes from consistency: similar distance from the camera, similar crop, and a reference object placed flat beside the jewelry.
A repeatable workflow: photo estimate, then sanity check
Use the same workflow for a chain-only listing, a bracelet with a clasp, or a pile of jump rings you plan to include in a kit. The trick is to run two estimates on purpose, then force yourself through a sanity check before you write a final number on your product page. That sanity check is what keeps you from pricing one necklace at 3.9 g and the next nearly identical one at 5.0 g just because the camera angle changed. Once you do this a few times, you will get a feel for what “looks right” for your common chain styles and findings sets.
After you land on final grams, do a quick unit conversion so your listing and shipping notes agree. For everyday ounces (avoirdupois), NIST conversion table shows 1 oz is about 28.35 g, so 5 g is about 0.18 oz (5 ÷ 28.35). That is handy when a buyer asks, “How many ounces of sterling is this?” and you only have grams recorded. If you also sell precious metals by troy ounce, keep a separate note for that system so you do not mix standards in your shop descriptions.
If two photos disagree by more than about 5%, assume the background or angle fooled the app. Re-shoot on flatter paper, straighten the chain, and try again until the numbers cluster.
For the hardest items to price, treat the chain and findings as separate line items in your own notes, even if your customer only sees one finished necklace. Example: your chain estimates at 3.8 g. Your lobster clasp estimates at 0.6 g. You add two 5 mm jump rings at 0.08 g each (0.16 g total). Your finished weight estimate is 3.8 + 0.6 + 0.16 = 4.56 g, which you can round to 4.6 g for a clean listing. That rounding rule matters, because it keeps you from over-tweaking, and it makes future reorders easier when you need to match the same “materials weight” you priced last time.
Sterling silver weight per cm: build your own cheat sheet
A personal grams-per-cm cheat sheet turns custom requests into quick math. Pick a few chains you already trust (same chain style you reorder, not random scraps). Measure length in centimeters, then estimate grams using the workflow above. Divide grams by length to get grams per cm, and write it in your notes. Concrete example: “If your favorite 45 cm chain estimates at 4.5 g, that is about 0.10 g per cm, so a 50 cm version is roughly 5.0 g.” Now you can quote a 55 cm upgrade as about 5.5 g without re-shooting every time, and you can still sanity check with a quick photo if the customer requests a different thickness.
Keep the cheat sheet practical by grouping it the way you actually build: “fine cable chain,” “curb chain,” “box chain,” plus a line for your standard clasp set (clasp plus jump rings). Each time you list a new design, copy the final grams into your product template and note what you assumed, such as “includes 1 lobster clasp, 2 jump rings.” Over a month of listings, you will build your own sanity-check library. If a new 45 cm cable necklace suddenly estimates at 6.2 g but your cheat sheet says 4.3 g to 4.8 g is normal, you will know to re-photo, double-check the chain style, or confirm you did not accidentally use a heavier clasp.
Build a jewelry pricing formula that scales
If you want pricing that stays sane as you add new SKUs, you need a formula that can absorb small design changes without forcing a full rethink. Weight is the easiest input to standardize because it tracks your real cost, especially for metal-heavy work like chains, bangles, and wire-wrapped pieces. The goal is not to guess a perfect number down to 0.01 g. The goal is to estimate grams consistently, plug that estimate into the same pricing math every time, and quote with confidence. Once your grams estimate goes into the materials line, the rest of the price can scale the same way across a 3 g charm, a 9 g pendant, and a 22 g chain.
Jewelry pricing formula: materials, labor, overhead, profit
Scrap gold price per gram is basically a reference value for the gold content inside an item, not a retail price tag for finished jewelry. Spot gold is commonly quoted per troy ounce, and a troy ounce is exactly 31.1034768 grams (see the troy ounce in grams conversion in a NIST reference). To translate that into a rough “gold value per gram,” makers usually divide spot-per-troy-ounce by 31.1034768, then adjust for karat purity (24k is 1.000, 18k is 0.750, 14k is 0.585, 10k is 0.417). That number is a sanity check, because real costs also include alloy, solder, waste, shipping, and your supplier’s markup.
Use one reusable formula and treat grams as the main driver of metal cost: Price = (Metal cost + other materials) + (labor minutes x your hourly rate) + packaging and fees + profit buffer. “Metal cost” can be as simple as estimated grams x your supplier cost per gram. Example: a pair of sterling hoops estimated at 6.8 g total, and your silver cost averages $1.10 per gram, metal cost is about $7.48. Add two ear wires at $0.60, plus a gift box at $0.85, plus 3.1% payment processing on a $48 sale (about $1.49), then layer in labor. If the design jumps from 6.8 g to 8.2 g because you used thicker wire, only one line changes, the materials line, and your price stays consistent across SKUs.
For labor, keep it practical: time three builds, take the average minutes, then add 10 to 15% for interruptions (tool hunting, polishing redo, a jump ring that fights you). Convert minutes to money by setting a real hourly rate, even if you are solo. Example: 38 minutes average build time for a pendant, plus 15% buffer is about 44 minutes. At $30 per hour, labor is about $22. Then add overhead and fees (studio rent, internet, Etsy listing fees, shipping supplies) as a flat per-order number like $3 to $6. Counterintuitive tip: raise price based on consistency, not perfection. If you can reproduce the piece reliably and customers keep buying, being 5% high is easier to correct than discovering you underpriced 30 orders in a row.
How accurate is a digital estimate for jewelry pricing
Aim for repeatability for quoting, not laboratory precision. In practice, a useful target for small jewelry pieces is staying within about 5 to 10% most of the time, for example estimating 7.5 g for a pendant that ends up 7.0 g to 8.2 g. If your designs vary a lot (chain thickness changes, different clasp styles, mixed metals), build a buffer into your formula instead of chasing “perfect” grams. A simple move is adding a metal loss factor, like charging for 0.5 g extra on small pieces, or adding 8% to the metal cost line for items with heavy clasps or end caps.
How do I estimate chain weight without a scale
Use two methods together so you are not guessing in the dark. Method 1 is a grams-per-cm cheat sheet built from your own inventory: weigh or estimate a few known chains in one style (like 2 mm cable, 3 mm curb) and record grams per cm. Then a 45 cm chain is just (grams per cm x 45). Method 2 is photo estimation, then validation: estimate the grams from photos, then compare the result to a known chain of similar style and length, and adjust your cheat sheet. The biggest source of error is hardware. Thick lobster clasps, end caps, and extender tips can add more grams than you expect, sometimes as much as the chain segment itself on short necklaces.
Can I price gold-filled using scrap gold price per gram
Scrap gold price per gram is based on pure gold content, so it is a reference point, not your direct cost for gold-filled findings. Gold-filled is a bonded layer of gold over a base metal, and your supplier sells it by piece, by foot, or by inch with their own pricing. The clean approach is pricing from supplier cost first (for example, $1.40 per gold-filled jump ring, or $6.50 per 12 inch segment of chain), then use grams as a consistency check across designs. Grams help you compare alternatives, like a heavier brass base chain versus a lighter stainless chain, and see which one keeps your margins steadier.
Want a faster way to get that grams input for your formula, especially when you are prototyping or quoting custom orders? Download Scale for Grams on iOS and estimate weight from photos, then view results in grams, ounces, or kilograms. Take a quick photo of a pendant, a chain segment, or a small package, get an estimate, and plug it straight into your materials line so your price stays consistent across SKUs. It is a simple workflow: estimate grams, calculate metal cost, add labor and overhead, then apply your profit buffer. If you sell online, that extra speed can mean answering custom quote messages the same day, without hunting for a physical scale.
Need to weigh something fast before you send a quote or update a listing? Download Scale for Grams and get an AI-powered weight estimate from a photo in seconds. It is a simple way to speed up your process and stay consistent across designs. Grab the app here: iOS. Try it today and price your pieces with more confidence.
Need to Weigh Something?
Download Scale for Grams and get an AI weight estimate from a photo in seconds.