Avoid Overweight Bag Fees: Estimate Luggage Weight
Here are reliable ways to estimate luggage weight without a scale, including the bathroom scale suitcase trick, simple packing checkpoints, and how photo-based weight estimation apps can help you stay under airline baggage limits.

Overweight bag fees usually hit when you are barely over the limit, and the worst part is you cannot feel a 2 to 5 lb difference by hand. A quick estimate before you leave can save money, time at the counter, and the stress of repacking on the floor. In this guide, you will learn simple ways to estimate suitcase and carry-on weight at home or while traveling, plus smart packing checkpoints that catch creep early. You will also see when photo-based estimation can help without a scale.
How to estimate luggage weight without a scale
You are standing in your bedroom the night before a flight, your suitcase looks fine, and that is exactly when overweight fees happen. The goal is not a perfect number, it is a safe buffer. Many airlines set checked bag limits around 50 lb (23 kg), and the painful zone often starts at 51 lb. Your best defense is a repeatable method you can do fast, even if you are tired and your bag is already zipped. Start by picking one method you trust (bathroom scale math), then back it up with a couple of feel checks, and finish with a simple routine so you do not undo your own work while tossing in “just one more thing.”
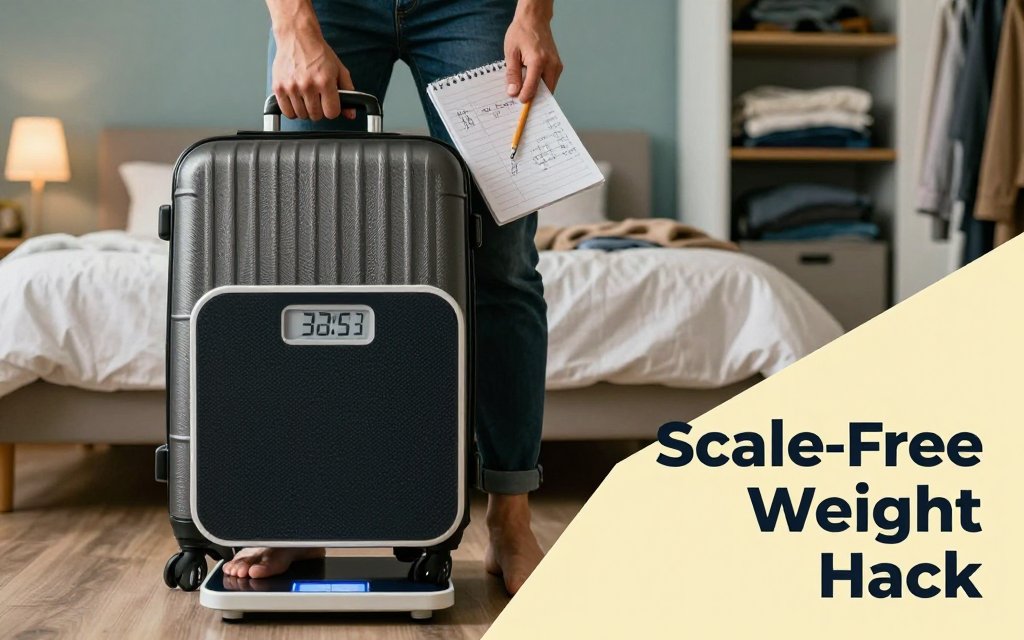
Bathroom scale suitcase trick that is actually reliable
Option 1 is the classic and it is genuinely accurate if you do it the same way each time: weigh yourself alone, then weigh yourself holding the suitcase, then subtract. Example: you alone are 162.4 lb. You plus the suitcase are 209.6 lb. Your suitcase is 47.2 lb, which is a comfortable spot if your limit is 50 lb. To tighten accuracy, do two rounds and average them, since many bathroom scales “hunt” by a few tenths. If you want an extra reference, the weigh luggage without scale walkthrough matches this approach and adds a few home hacks for awkward bags.
Option 2 is for bulky suitcases that you cannot safely hug to your chest. The simplest version is the “one foot on, one foot off” trick. Stand with one foot on the scale and one foot on the floor, keep your posture upright, and note the number. Then swap feet and note the second number. Add the two readings for an estimate of your total body weight, and compare that total with and without holding the suitcase. If your scale wobbles with this method, place a sturdy board (like a thick cutting board) on the scale to create a larger, flatter platform. Avoid the common accuracy killers: do not lean on a wall, do not put the scale on carpet, keep the suitcase from touching your leg, and step off fully so the scale re-zeros between readings.
Aim for a buffer: if the limit is 50 lb, pack to about 47-48 lb. That 2-3 lb cushion covers scale differences, last-minute souvenirs, and the way hard cases gain weight from damp straps or covers.
Fast carry on weight estimate checks before you leave
Carry-on weight rules vary a lot by airline and route, so your “feel test” is about two things: can you lift it confidently into an overhead bin, and does it pass the quick sanity checks that correlate with weight. Dense items are the sneaky culprits. One pair of shoes can be 2-3 lb, a full toiletry bag can be 3-6 lb, and chargers plus a power bank can easily add another 1-2 lb. If your carry-on suddenly feels like a small sack of bricks, it probably is. The point of these checks is speed. Do them before you leave the house so you are not repacking on an airport floor.
Those comparisons work because your brain is decent at relative weight. If you know a 10 lb dumbbell feels “easy but real,” you can tell when a bag is drifting toward 20 lb because it stops being a one-hand lift. If you do not own weights, use pantry anchors: a 5 lb bag of flour or sugar is a great reference, and a full gallon of water is about 8.3 lb. For small business owners who already think in shipping weights, this is the same idea as staying under a carrier threshold. You are using known objects to catch the moment your carry-on crosses from “fine” to “this could be a problem.”
A simple night-before travel routine that prevents last-minute weight creep
Make your routine boring, because boring is what keeps you under the limit. Step 1: pack everything you think you need, zip the bag, then do your bathroom scale weigh-in and write the result in a note on your phone (example: “Checked bag 47.2 lb, 9:15 pm”). Step 2: pull out the top three dense categories and decide where they should live. Shoes, jeans, toiletry bottles, and chargers belong in your personal item if your checked bag is close to 50 lb. Step 3: set a hard stop. If you add anything after the weigh-in, you must re-weigh. This one rule prevents the classic chain reaction of souvenirs, extra jackets, and “backup” items.
If you like having a second opinion on small items, treat it like food portioning: estimate, check, then adjust. The same skill that helps you eyeball 30 g of nuts or a 150 g chicken portion can help you spot a toiletry kit that is creeping from 2 lb to 5 lb. If that kind of estimating is already part of your day, you will probably enjoy palm to grams macro tracking, because it trains the same “quick, good-enough” measurement habit. For luggage, that habit pays off when you can confidently remove one dense pouch, recheck, and watch the number drop by 1-3 lb immediately.
Packing checkpoints that prevent overweight bag fees
Pack like the limit is lower than the limit. If your checked bag allowance is 50 lb, aim to finish at 46 to 48 lb, then stop. That cushion is what keeps you from doing the sweaty, last minute floor repack at the airport. A 2 to 4 lb buffer covers three common surprises: airline scale differences (your bathroom scale versus their calibrated counter scale), small items you forgot you added (charger, paperback, toiletry pouch), and the little travel habits that add weight fast (filling a water bottle, adding snacks, tossing in a "just in case" sweater). Make this repeatable by using three checkpoints: first pack, then audit, then lock. Pack once, audit once, then close the zipper and do not reopen unless something else comes out first.
Here is the simple checkpoint system that cuts guessing: do a rough weight estimate as soon as everything is in the bag, do a second check the night before, then do a 60 second "door check" before you leave. The point is not perfection, it is confidence. If you are estimating from a photo or a quick method at home, keep the same routine every trip so your brain learns what "safe" feels like. If you want a menu of options (from lift tests to quick DIY methods), keep weigh luggage without a scale bookmarked and pick one method you can repeat every time. (scaleforgram.com)
Use a buffer: pack to 2 to 4 lb under
Most US airlines treat 50 lb (23 kg) as the standard checked bag cutoff in economy cabins, and overweight fees kick in above that. Even within the same airline, that limit can change by cabin and route, so your safest move is to pack under 50 lb on purpose, not "right at" 50 lb. For example, Delta’s standard limit for many passengers is 50 lb per bag, with different limits in premium cabins. That is why 46 to 48 lb is a sweet spot for a checked bag. For carry-ons, some routes and airlines are stricter about weight than you may be used to, so leave a 1 to 2 lb cushion if you know you will face a carry-on weigh-in at the gate.
The easiest way to create that cushion is to plan a "transfer lane" before you even start packing. Pick one personal item that you will carry anyway, like a small backpack or tote, and reserve it for one dense item that can move if needed. Boots are the classic surprise weight. A single pair of ankle boots can easily be 2 to 4 lb depending on the sole and size, so moving them out of the main bag often fixes an overweight problem instantly. If your airline allows a personal item plus a carry-on, you can also shift a power bank, compact camera, or a pouch of chargers into the personal item without changing how your main bag closes. That is the buffer strategy in real life: build an exit ramp for weight.
The densest items to move first when you are over
Picture this: you are at 53 lb, which is only 3 lb over, but it is enough to trigger an overweight fee. Do not start by pulling out socks or a T-shirt. Go straight for dense, awkward stuff that hides weight. Toiletries are a top offender because liquids add up fast. A full size shampoo (12 oz) plus conditioner (12 oz) plus body wash (16 oz) is already about 2.5 lb once you include the bottles, and that is before skincare, sunscreen, and makeup. If you are over, pop out the toiletry bag first and ask, "What can be decanted?" Moving to a couple of 3 oz bottles can drop a pound quickly, and it also makes the bag easier to organize.
Next, pull out the "dense fabric" category: jeans, shoes, and heavyweight layers. One pair of adult jeans is commonly around 1.3 to 2.0 lb, and a hoodie can be 1 to 1.8 lb depending on fabric and size. If you are 3 lb over, wearing your heaviest jacket and your heaviest shoes to the airport can solve it without losing anything. Hardcover books are another sneaky one, often 1 to 2.5 lb each. If you insist on reading material, switch to one paperback or an e-reader. Hair tools can be shockingly heavy too, especially a full size hair dryer or a curling iron with a thick cord. Put the tool in your personal item only if your airline rules allow it, otherwise leave it behind and plan on the hotel dryer.
Finally, do the "check-in shuffle" that frequent travelers use: move dense electronics out of the bag right before you hand it over. A large power bank can be 0.7 to 1.2 lb, and a pouch with a laptop charger, phone charger, and a couple of plug adapters can be another 0.5 to 1.0 lb. If you are close to the line, shift chargers into a jacket pocket during check-in, then put them back after the bag is tagged. A small crossbody works well here because it counts as a personal item on many tickets, and it keeps your passport, phone, and heavy little items together. The goal is not to be sneaky, it is to keep your checked bag comfortably under the cutoff so you can walk away without paying for 3 lb of "oops."
Can a photo weight estimation app help with luggage
A photo-based weight estimation app can help with luggage, as long as you treat it like a fast backup, not a check-in guarantee. The biggest win is speed. If you are packing at 11:30 pm and you need a quick read on whether you are clearly under the limit, right on the edge, or definitely over, a photo estimate can guide your next move in minutes. It is also useful for comparison. If you are choosing between packing boots or sneakers, or swapping a full-size toiletry bag for travel minis, you can estimate both options and pick the lighter setup before you zip the suitcase.
When photo-based estimates are good enough - Set expectations
Photo estimates are best for decision points, especially around common airline thresholds like a 50 lb (about 23 kg) checked bag limit. Think in ranges: under, near, over. If your photo estimate suggests your suitcase is about 38 lb, you can probably stop stressing and focus on organization. If it estimates 49 lb, that is your cue to move a dense item (like a laptop, a pair of jeans, or a 1 lb bag of coffee) into your personal item. If it estimates 55 lb, you likely need a real fix, not wishful thinking. The goal is to avoid surprises, not to chase a perfect number.
To get the most out of a photo estimate, tighten up the process. Shoot in bright, even light so shadows do not hide the outline of the bag. Keep the whole suitcase in frame, including wheels and handles. If you can, include a reference object that is a known size, like a credit card, a standard sheet of paper, or a US quarter, placed next to the suitcase on the floor. Take 2 to 3 photos from slightly different angles and average the results. Apps like Scale for Grams are especially handy for travel because you can also estimate the weight of what goes inside the suitcase, like snacks, toiletries, small packages, or jewelry pieces, when you do not have a physical scale nearby.
Use a photo estimate like a traffic light. Green means pack confidently. Yellow means move 2 lb to 5 lb into a carry-on. Red means remove a heavy item before you get to the counter.
FAQ: suitcase weight limits, hacks, and accuracy
If you need exact numbers, a dedicated luggage scale still wins, and it is small enough to travel with. Condé Nast Traveler tested multiple models (including strap and hook styles) and even describes a test setup using a 25 lb carry-on and a 50 lb checked bag as a baseline, which is a realistic way to think about common limits. If you want a physical option for future trips, their roundup of best luggage scale picks is a useful starting point. A photo estimator is the thing you use when you forgot the scale, your hotel room has no bathroom scale, or you are repacking on the floor near the elevator.
How do I weigh a suitcase without a scale while traveling?
Use a layered approach. First, check the room: some hotels have a bathroom scale or a gym scale you can use briefly. If you have neither, do a photo estimate to decide whether you are safely under or probably over. If you are near the edge, repack by moving dense items into your personal item: chargers, toiletries, books, and shoes shift weight fast. If you are already at the airport, many check-in areas have self-service bag drop scales that show weight before you fully commit. A last resort is a shipping store scale, which can be surprisingly accurate for a taped-up bag.
What is the most accurate bathroom scale suitcase trick?
Weigh yourself, then weigh yourself holding the suitcase, then subtract. For example, if you are 162.4 lb alone and 208.0 lb holding the bag, the suitcase is 45.6 lb. Accuracy depends on repeatability, so do it three times and use the average. Stand on hard flooring, not carpet. Hold the bag close to your body so it does not swing, and keep your posture the same each time. Common mistake: letting the suitcase rest on the floor slightly, which can “steal” a few pounds and cause an unpleasant surprise at check-in.
How accurate are phone scale apps and photo weight estimation apps?
Expect estimates, not lab precision. Many “phone scale” apps struggle because a phone cannot directly measure weight without a calibrated sensor setup, and results can vary a lot by device and how you use it. Photo weight estimation can be more practical, but accuracy depends on lighting, distance, camera angle, and whether the app has a reliable size reference. A good way to use any estimate is to create a buffer. If the airline limit is 50 lb, treat any estimate from about 47 lb to 53 lb as a danger zone and move 2 lb to 5 lb out of the checked bag. Use photo estimates to choose what to remove, then confirm with a real scale when you can.
Need to weigh something fast when you do not have a scale nearby? Download Scale for Grams and get an AI-powered weight estimate from a photo in seconds, which is perfect for last-minute packing decisions. Try it before you head to the airport so you can adjust early and avoid surprises at check-in. Get Scale for Grams here: iOS.
Scale for Grams
Need to Weigh Something?
Download Scale for Grams and get an AI weight estimate from a photo in seconds.