Bubble Mailer Weight Chart: Price Postage Correctly
A practical bubble mailer and poly mailer tare-weight guide, plus a simple photo-based method to estimate total shipping weight so you can pick the right USPS Ground Advantage label and avoid underpaid postage or postage-due surprises.
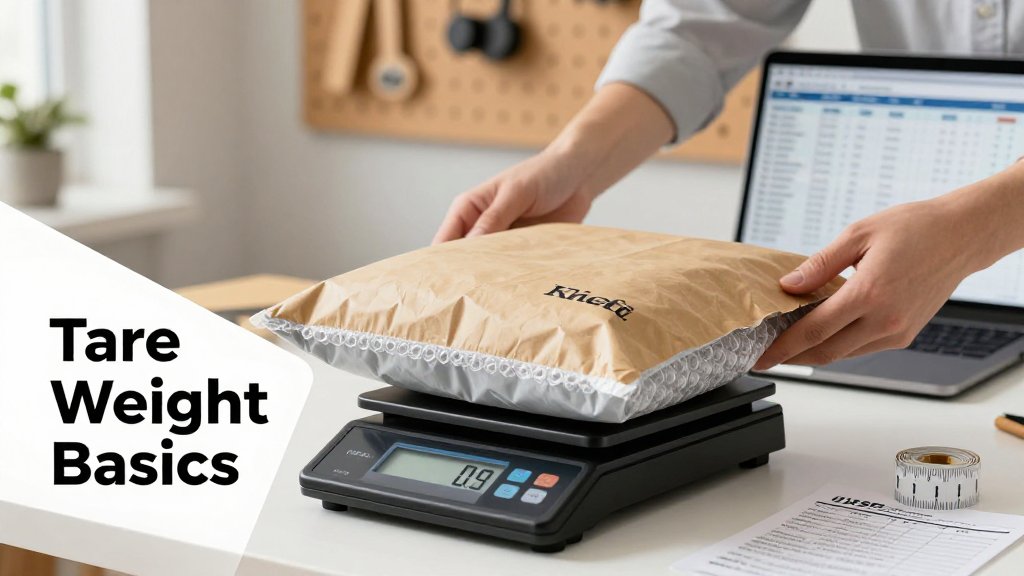
Postage gets messed up for a simple reason: most people weigh only the product and forget the bubble mailer, shipping label, and tape. Those extra grams can bump a package into the next rate tier, which means underpaid postage, returns, or unexpected costs. This guide gives you a quick bubble mailer weight chart with common tare weights, plus a practical method to estimate total shipment weight accurately. You will also learn how to make solid weight guesses from photos when you do not have a scale.
Bubble mailer and poly mailer tare weights
If you have ever been surprised by a label adjustment or a “postage due” notice, the culprit is often tare weight, which is the packaging weight before you add your product. A bubble mailer that feels “light” can still be close to an ounce all by itself, and that matters because USPS pricing typically moves in ounce steps for many common mail classes. USPS also has firm weight limits for what can be mailed as letters or large envelopes (for example, First-Class Mail letters top out at 3.5 oz, and large envelopes can go up to 13 oz), so being off by even a little can push you into a different category or price. It is worth bookmarking the official First-Class Mail postage rates page, then pairing it with the simple tare ranges below.
Typical empty weights you can start with
Use these as “typical retail mailers” baselines, meaning common kraft bubble mailers and standard 2 mil to 3 mil poly mailers you would buy on Amazon, at an office store, or from mainstream packaging suppliers. The key is the range: you can confidently buy labels with a realistic estimate, but you should still expect brand-to-brand variation. Kraft paper bubble mailers usually weigh more than poly mailers of a similar footprint, and metallic or printed finishes can push weights up. If your shipment estimate is landing near an ounce cutoff (like 3.9 oz vs 4.1 oz), treat the higher end of the range as your planning number, or add a cushion.
| Mailer type | Common size | Typical empty weight (tare) | Notes |
|---|---|---|---|
| Bubble mailer (kraft, padded) | #0 (6 x 9 in) | 0.6 to 0.9 oz (17 to 26 g) | Often used for jewelry, small parts, cosmetics. Extra-thick bubble and wide adhesive strips trend higher. |
| Bubble mailer (kraft, padded) | #2 (8.5 x 11 in) | 0.9 to 1.3 oz (26 to 37 g) | A common “small apparel” mailer. Printed or metallic styles can add noticeable weight. |
| Bubble mailer (kraft, padded) | #4 (10.5 x 16 in) | 1.6 to 2.4 oz (45 to 68 g) | Popular for larger apparel bundles and boxed items. Wide side seams and heavier paper increase tare. |
| Poly mailer (standard) | 6 x 9 in | 0.2 to 0.4 oz (6 to 11 g) | Good for very light, non-fragile items. Tear-resistant blends can weigh a bit more. |
| Poly mailer (standard) | 10 x 13 in | 0.4 to 0.7 oz (11 to 20 g) | One of the most common ecommerce sizes. Higher mil thickness usually sits at the top of the range. |
| Poly mailer (standard) | 14.5 x 19 in | 0.7 to 1.2 oz (20 to 34 g) | Large clothing orders. Double self-seal strips and longer flaps add weight fast. |
Why can two “same size” mailers weigh differently? Construction details add up. Side seams can be narrow or reinforced. The peel-and-seal adhesive strip can be short, or it can be a wide band that runs nearly edge to edge. Bubble padding varies by bubble height and thickness, and some brands use heavier kraft paper or add a laminated coating for moisture resistance. Even the flap length matters, since a long flap is basically extra material you ship on every order. If you switch from plain kraft to metallic, holiday-printed, or extra-thick “premium” bubble mailers, assume your tare weight will jump, sometimes by several grams, and retest your pack-out estimate.
A simple sanity check keeps you from getting burned by a heavy batch of mailers: check the product listing for a per-mailer weight or a “shipping weight” for the pack, then do the quick math. For example, if a 100-pack is listed as 8 lb shipped, that is about 1.28 oz per mailer (8 lb x 16 oz = 128 oz; 128 oz divided by 100). That is heavy for many poly mailers, so you would plan postage using the high end of the ranges, or pick a lighter option. If you do not have a physical scale, you can also photo-estimate one empty mailer in Scale for Grams and confirm it lands in the same neighborhood as the chart, then adjust your default tare for that supplier.
Before you buy postage, assume your mailer is not weightless. Add the empty mailer plus inserts to your estimate, and if your total lands near an ounce cutoff, round up and pay for the next ounce.
One common mistake that causes postage due
The classic trap looks like this: an Etsy seller lists an item as “3 oz shipped” because the product itself weighs about 3.0 oz. Then the packing materials quietly push the real number over the line. A #2 (8.5 x 11) bubble mailer alone is often around 0.9 to 1.3 oz (26 to 37 g). Add a 4 x 6 thank-you card (often 0.1 to 0.3 oz depending on cardstock), a small inner poly bag (0.1 to 0.2 oz), and a piece of tape or a sticker seal (0.05 to 0.15 oz). Suddenly your “3 oz shipped” pack-out can land closer to 4.3 to 4.9 oz, which can bump you into the next ounce bracket.
If you are estimating without a scale, build in a cushion on purpose. A practical default is adding 0.3 to 0.5 oz (about 9 to 14 g) on top of your best estimate, especially for bubble mailers or any order with inserts. This tiny “insurance” covers normal variation like thicker seams, a second adhesive strip, or a slightly heavier print run of cards. For repeat shipping, do one test pack-out per mailer size: write down the tare range you observe, the typical insert weights you use, and the label class you usually buy. That turns guesswork into a repeatable checklist, even on busy shipping days.
Heavier, flat items make tare weight even more critical because you often add stiffeners. A single cardboard stiffener can easily add 1.0 to 2.0 oz (28 to 57 g) depending on thickness, which is more than many poly mailers. If you ship media, prints, or collectibles, plan your default pack-out as “product + stiffener + mailer,” not just product. For vinyl, it helps to keep a dedicated reference note for your shop because records vary by jacket, inserts, and outer sleeves. If that is part of your workflow, keep vinyl record LP weight bookmarked, then add your chosen mailer tare from the chart so you do not underbuy postage on a heavy order.
How to estimate shipping weight without a scale
Your end goal is simple: buy the right label the first time. That means you want a total shipment weight that is safe, repeatable, and slightly conservative, so you do not get hit with postage due or a label adjustment after the fact. The trick is to stop guessing the whole package at once. Instead, estimate in parts: the mailer (tare), the product, then the little “extras” that quietly add up. Once you do this a few times, you will recognize common totals fast, like “small jewelry order is usually 2 to 4 oz” or “two brownies plus padding is often 8 to 12 oz.”
Start by deciding what label decision you are trying to make. For many small shipments, the real cliff is around 4 oz, 8 oz, 12 oz, and 16 oz (1 lb). If you land at 15.6 oz, you can often stay under a 1 lb price point. If you land at 16.2 oz, you should plan and pay as 1 lb and avoid surprises. The point of photo-based estimating is not to get a perfect number like 9.12 oz. It is to confidently choose the correct bracket, with a buffer that protects you.
Photo based estimation method that actually works
Step 1 is mailer tare. Identify the bubble mailer size and material from your supplies, then pick a tare range from Section 1 (for example, a small kraft bubble mailer is usually heavier than a thin poly bubble mailer). Step 2 is product weight from a photo. Use a known reference in the same photo, like a credit card (about 3.37 x 2.13 in), a ruler, a common mug, or a coin, then estimate volume and material. If you want speed and consistency, an app like Scale for Grams can do the photo-based estimate in grams or ounces, then you just add packaging.
Step 3 is “packing extras” weight, which is where most underestimates happen. A pair of earrings might be only 2 to 6 g, but a small gift box plus cotton fill can be 30 to 70 g by itself, before you even add the bubble mailer. As a concrete example, say you ship stud earrings (5 g) in a rigid jewelry box (45 g), add a small zip bag (3 g), a thank-you card (10 g), and a small bubble mailer (25 g tare from your Section 1 range). Total is about 88 g, which is about 3.1 oz. That is not a 1 oz shipment, even though the jewelry is tiny.
If your estimate is close to a price tier, round up. Add at least 0.5 oz of buffer for light shipments, and 1 oz for anything near 16 oz. Paying slightly more is cheaper than a returned package.
How to use common references in photos
References work best when they are flat, standardized, and placed on the same plane as the item. A coin is great because its size and weight are consistent. For example, a modern US quarter weighs 5.670 g according to the U.S. quarter specifications, so you can use it as a reality check when estimating small objects like rings, charms, or lip balm tubes. If your “tiny pendant” estimate comes out to 40 g, but it looks similar in volume to 2 to 3 quarters stacked, that is a sign you should revise downward. For baked goods, include a reference that shows thickness, like a ruler beside a cookie, not just a top-down shot.
Rounding rules that protect your postage
Step 4 is rounding up before you buy postage. Rounding is not “cheating,” it is how you avoid the most common failure mode, forgetting something small. Food shipments are the classic example. A single thick cookie might be 75 to 90 g, but add a food-safe bag (3 to 6 g), a bubble wrap sleeve (5 to 10 g), a note card (8 to 12 g), and a bubble mailer (20 to 35 g), and you can jump from roughly 3 oz of product to 4.5 to 5.0 oz total. If you sell meal prep portions, this also helps you stay consistent: if your photo estimate says 9.6 oz of cooked chicken, you can log 10 oz for tracking and ship as 12 oz with confidence.
Finally, keep a tiny “known totals” note for your most common orders. After you ship five packages that all used the same 6x9 bubble mailer, the same insert, and the same product type, your photo estimates get faster because the extras become nearly constant. If you also need to confirm what type of mailpiece you are sending and how it is tracked, the first-class flats tracking options page is a helpful reference for bubble mailers, large envelopes, and similar categories. Your system then becomes repeatable: identify mailer, estimate product from photo with a reference, add extras, then round up to a safer number before purchasing the label.
USPS Ground Advantage weight brackets and safeguards
USPS Ground Advantage labels are all about getting your package into the right weight bracket, so your barcode matches what USPS actually processes. For most small bubble mailers, the big breakpoints happen before 1 lb: USPS commonly prices at 4 oz, 8 oz, 12 oz, and 15.999 oz, then switches to per-pound pricing once you are over 1 lb. USPS also treats “just a little over” as the next bracket, meaning 4.1 oz gets priced like 8 oz, and 1.25 lb gets priced like 2 lb. You can see this spelled out in the USPS Ground Advantage rounding rules, which is why conservative rounding matters so much for bubble mailers.
The safeguard you care about is avoiding underpaid postage adjustments. If you buy an 8 oz label but your finished package is actually 8.2 oz, USPS can re-rate it to the 12 oz bracket during processing. On marketplaces (Etsy, eBay, Shopify apps, Pirate Ship, and others), that usually shows up as an adjustment charged back to your account, or the package can arrive with postage due in some situations. The frustrating part is that bubble mailers feel “light,” so people eyeball them, then tape, inserts, thank-you cards, or a rigid backing quietly push the total over a threshold. Your goal is not perfect precision, it is picking a label that is very unlikely to be under.
When to round up and how much cushion to add
If your estimate is close to the next ounce, round up. If you are estimating without a scale, add cushion before you round, because your “missing” weight usually comes from the stuff you forget to count. A practical buffer for small mailers is about 0.3 to 0.5 oz (roughly 9 to 14 g). Example: you estimate a beaded bracelet plus inner bag at 3.7 oz. Add 0.4 oz cushion to get 4.1 oz, then buy the 8 oz Ground Advantage label because anything over 4 oz risks pricing like 8 oz anyway. Pay extra attention to “just under 4 oz” and “just under 8 oz,” since one extra strip of tape or a thicker mailer can be all it takes.
Once you are flirting with 15.999 oz, be even more conservative. A package that “should be” 15.6 oz can easily become 16.2 oz after you add a packing slip and seal it, and that pushes you into per-pound pricing. USPS also has dimensional factors for large, low-density parcels, and some platforms ask for dimensions every time. Still, for typical bubble mailers and small padded envelopes, weight mistakes are the most common problem, not dimensional pricing. If your estimate is near a breakpoint and your margins are thin, it can be worth switching packaging: a poly bubble mailer instead of kraft, a smaller size, fewer inserts, or skipping a heavy rigid chipboard insert when the item is already protected.
FAQ: bubble mailer and postage weight questions
These are the questions that come up constantly for Etsy sellers, home bakers shipping cookie packs, and jewelry makers sending small orders. The theme is simple: USPS charges based on the finished, sealed, ready-to-mail package, not the product by itself. That means you need a plan for packaging weight (mailer tare), rounding, and a little buffer for the unknowns. If you do those three things consistently, you will pick the right Ground Advantage label far more often, and you will see fewer surprise adjustments. Also remember that small bubble mailers rarely trigger dimensional pricing, so for this type of shipment, getting weight right is usually the fastest win.
How much does a bubble mailer weigh in ounces and grams?
Empty bubble mailers vary a lot by size and material, which is why “about an ounce” can be wrong in both directions. According to ParcelPath’s bubble mailer weight estimates, many empty bubble mailers fall between 0.3 and 3.0 oz. A common 6x9 poly bubble mailer is about 0.4 to 0.5 oz (about 11 to 14 g), while an 8.5x10.75 kraft bubble mailer can be up to about 0.8 oz (about 23 g). Treat these as starting points, then add your item, inserts, tape, and label.
What is mailer tare weight and why does it matter for USPS labels?
Tare weight is the weight of your empty packaging, meaning the bubble mailer itself plus anything you always include (like a standard insert card or inner poly bag). It matters because USPS labels are based on gross weight, which is product plus packaging. If your earrings are 2.9 oz but your mailer is 0.5 oz and your label plus tape is another 0.2 oz, your ship weight is about 3.6 oz, not 2.9 oz. That difference decides whether you can safely buy a 4 oz label, or if you should bump up to the 8 oz bracket to avoid an underpaid adjustment.
How do I avoid underpaid postage if I do not own a scale?
Build a conservative routine and stick to it. First, standardize your packaging so you are not guessing a different mailer every order (pick one mailer size for most shipments and learn its empty weight range). Second, estimate the item weight, then add a buffer of about 0.3 to 0.5 oz (9 to 14 g) to cover tape, inserts, and variation between mailer brands. Third, round up to the next USPS Ground Advantage bracket, especially near 4 oz, 8 oz, and 15.999 oz. If your estimate plus buffer lands at 7.9 oz, buy 8 oz. If it lands at 8.1 oz, buy 12 oz. This approach costs a little more upfront, but it dramatically reduces surprise adjustments.
Need to weigh something fast without digging out a scale? Download Scale for Grams to get an AI-powered weight estimate from a photo in seconds, then use it to sanity-check your bubble mailer plus item total before you buy postage. Try it now on iOS, and start shipping with fewer surprises and fewer label reprints.
Scale for Grams
Need to Weigh Something?
Download Scale for Grams and get an AI weight estimate from a photo in seconds.