Ultralight Pack Math: Estimate Gear Weight From Photos
Learn a repeatable, photo-first method to estimate backpacking gear weight in grams and ounces, build a base weight list, and spot the heaviest upgrades before your next thru-hike, even if you do not own a physical scale.
Gear weight has a way of drifting upward, and it is frustrating when your kitchen scale is too small for a full kit and manufacturer specs do not match your real setup. This guide shows a practical workaround: use photos to estimate weight in grams and ounces, then log the numbers so you can compare items fairly. You will learn how to take consistent shots, make quick estimates, spot the heaviest offenders, and choose one upgrade that delivers the biggest payoff.
How to estimate backpacking gear weight from photos
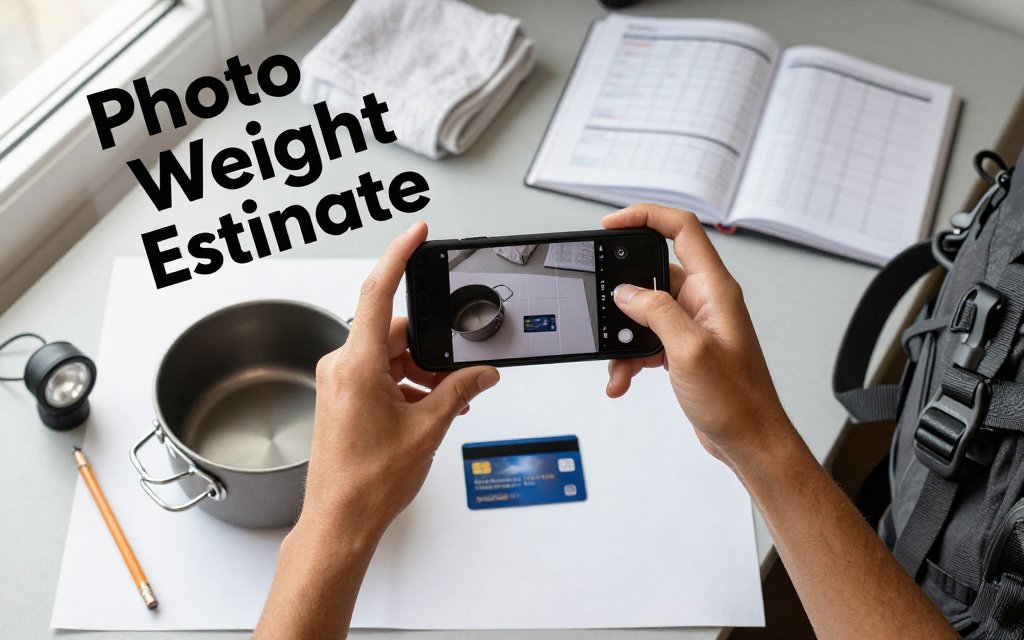
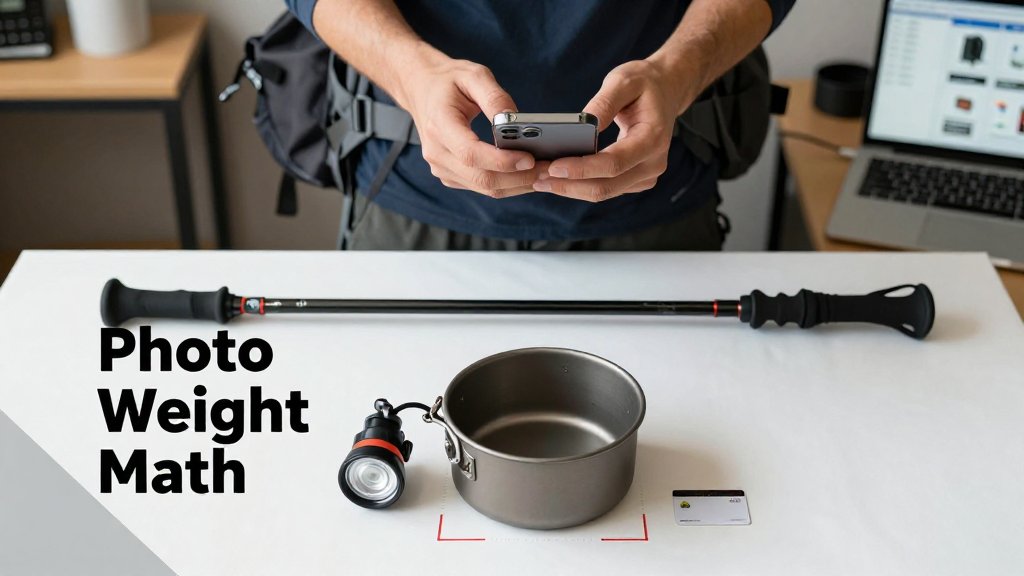
A clean, consistent top-down photo with a size reference can give you a fast, usable gear weight estimate, even when you are nowhere near a scale. That is the whole trick behind ultralight pack math from photos: you are not chasing lab accuracy, you are trying to answer practical questions like, “Is this cook pot closer to 140 g or 240 g?” and “Is my headlamp actually heavier than my spare battery?” With the Scale for Grams iOS app, the goal is to snap the photo the same way every time so the computer vision has repeatable input. Do it at home during a gear spreadsheet update, in a hostel on a shared table, or mid-shakedown on the floor next to your pack.
Treat your camera like a measuring tool: same angle, same distance, one reference object. A 10 g error is fine if it helps you choose between a 120 g wind shirt and a 180 g one.
A simple photo setup that improves accuracy
Consistency matters more than fancy equipment. Pick one flat surface and reuse it, a hostel desk, a hotel nightstand, even a smooth section of floor. Use bright, even light so edges are clear, which helps the app separate the object from the background. A plain background (a solid towel or a sheet of printer paper) beats a patterned tablecloth that confuses outlines. Then add one reference object with known size, such as a credit card, a trekking pole section laid parallel to the item, or a standard envelope. Common mistakes that inflate error are angled shots (your “circle” pot becomes an oval), strong side shadows that hide the rim, and mixing multiple pieces in one photo so the app cannot tell what should be weighed.
Use a repeatable workflow you can do in under a minute. Place one item down, place the reference next to it (not on top), step back to the same distance, then shoot straight down. For small items, fill more of the frame so the object has enough pixels to analyze. For larger items, keep extra space around the edges so nothing gets cropped. This is easy to practice with three classic “mystery weight” items: a headlamp (straps and angles change a lot), a wind shirt (thin fabric disappears into shadows), and a cook pot (shiny rims create glare). If your headlamp cord is flopped out in one photo but coiled tightly in another, you can accidentally “add” 10 g to 20 g just from inconsistent shape and coverage.
Turn the estimate into grams and ounces you can use
Record estimates in grams first, because grams stay readable for tiny items where ounces become decimals. As a quick rule, 28 g is about 1 oz, 100 g is about 3.5 oz, and 454 g is 1 lb. Those round numbers are what most backpackers use in conversations, and they are close enough for gear decisions. If you need the exact conversion for a spreadsheet, the National Institute of Standards and Technology lists the ounce (avoirdupois) as 28.349523125 grams, which you can verify in the NIST SI conversion factors. (nist.gov) Then convert to ounces only when you want to compare with common “sub-10 oz” and “sub-1 lb” upgrade targets.
Here is how that looks in real pack triage. Say your photo estimate puts a headlamp at 95 g. That is about 3.4 oz, which is “fine” for most trips. If you are deciding between two wind shirts and the photos estimate 120 g (4.2 oz) versus 180 g (6.3 oz), that 60 g difference is about 2.1 oz, which is big enough to notice in your base weight. For a cook pot, you might see 165 g (5.8 oz) for a solo pot versus 260 g (9.2 oz) for a slightly larger, thicker one. Add those differences up, and photo estimates can show you where the easy wins are, even before you pull out a physical scale.
To make this useful during a hostel repack or a living-room shakedown, treat it like a mini inventory project. Create a single album called “Gear weights” and photograph each item once, cleanly. Rename the photo with the estimate, like “wind-shirt-120g.jpg,” and keep a notes line for the version (for example, “cut tags,” “swapped cord,” “removed stuff sack”). That way, when you are choosing what to ship home, what to replace, or what to keep, you are comparing numbers that were captured the same way. The same habit also helps with food portions and macro math. If you track protein or carbs on the go, the photo-first routine pairs nicely with macro tracking without food scale methods for quick, consistent estimates.
Keep expectations realistic so the estimates stay helpful instead of frustrating. Photo-based weight estimates are strongest for comparing similar items and spotting outliers, like a “tiny” repair kit that is secretly 220 g, or a stuff sack collection that adds 80 g. They are weaker when materials vary a lot in density (titanium vs steel), when an item is translucent or glossy, or when you photograph soft items in wildly different shapes. Finally, remember the use case: this is great for prioritizing upgrades and keeping your pack list honest, but it is not the tool for airline check-in limits or postage labels where exact weight matters. Use the estimate to decide what to weigh precisely later, and you will save time and money.
Build a base weight calculator that stays accurate
Single-item photo estimates are useful, but the real payoff is a base-weight system you trust. Think of it like baking by weight or portioning meals: you do not need every number to be perfect to the gram, you need consistency so the big changes stand out. A 15 g error on a spoon does not matter if it helps you notice that your shelter setup quietly jumped by 220 g after you added a heavier stuff sack, thicker guylines, and extra stakes. Your goal is a living list that stays close to reality, so you can make smart swaps quickly and avoid surprise pack creep before a trip.
A base-weight list that matches real carry
Start with a simple rule that prevents 90% of mistakes: if it is in your pack at the trailhead, it goes in the list. That includes the pack itself, your shelter system (tent or tarp, stakes, guylines, pole or trekking pole adapters, groundsheet), your sleep system (pad, quilt or bag, pillow, pump sack), carried clothing (puffy, rain gear, spare socks), cook kit, electronics, repair kit, and the small stuff that adds up. For a quick sanity check, Backpacking Light’s base (dry) weight definition is a good reference: it excludes consumables like food, water, and stove fuel, and it also flags the common “container” problem (empty bottles and canisters still weigh something).
The traps are predictable, which is good news because you can design your spreadsheet to block them. Trekking poles are the classic double-count: they are often “worn” in your hands, but if you strap them to your pack for a scramble, they become carried weight. Pick one category and stick to it. Liners get forgotten all the time: a trash-compactor bag liner might be about 60 g to 90 g, and a pack cover can be another 70 g to 110 g. Stuff sacks are sneaky too, especially when you have five of them at 15 g each. That is 75 g, plus a 25 g mesh ditty bag, and suddenly you are up 100 g without noticing.
Structure your spreadsheet so it stays useful even if every number is an estimate. Use columns like Category, Item, Qty, Estimated grams, and Notes. Then sort by grams to surface the “big rocks” first. If your pack is listed at 980 g, shelter at 1,050 g, and sleep system at 1,250 g, those three lines tell you where most wins live, even if each is off by 30 g. Add a “photo date” note so you know what was last verified with Scale for Grams. Example note: “Tent: photo-estimated 2026-04-01, swapped to lighter stakes on 2026-04-05.” That way you can confidently compare last month’s list to this week’s list.
Versioning your kit for trips and seasons
Instead of rebuilding from scratch for every trip, make 2 to 3 presets and treat them like saved recipes. A simple set is Summer, Shoulder-season, and Winter-lite. Summer might use a 40 F quilt (for example, 620 g), a torso pad (250 g), and a minimal rain shell (190 g). Shoulder-season might bump you to a 20 F quilt (850 g) and a warmer pad (430 g), adding about 410 g. Winter-lite might add traction, heavier gloves, and a warmer puffy, and it can easily add another 600 g to 1,200 g depending on conditions. With presets, your spreadsheet becomes a fast planning tool: pick the preset, adjust the consumables separately, and you have a realistic starting point in minutes.
Versioning only works if you write down the tiny changes that cause drift. Put a short note right beside the item, not in a separate journal you will never open. Examples that matter: “stakes: swapped to 6 mini stakes,” “added 1.5 mm guyline,” “new pack strap pockets,” or “moved to a bigger food bag.” Then use a repeatable re-check habit: anytime you change a component, snap a new photo and re-estimate that component, not the whole pack. If you replace eight 12 g stakes (96 g) with six 7 g mini stakes (42 g), you just saved 54 g and your base-weight total should reflect it immediately. Your list stays accurate because it keeps up with how you actually pack, week after week.
Use pack math to avoid overpacking fast
Here is the conclusion that saves you the most weight, the fastest: the big wins almost always come from your shelter, pack, and sleep system. If your base weight list is already dialed in, shaving 6 g off a toothbrush or 12 g off a spoon can be fun, but it rarely changes how you feel after a 10 mile day. Pack math means looking at your heaviest items first, using quick photo-based estimates (plus whatever real weights you already have), and turning those numbers into a simple decision: keep, replace, or re-think the whole system.
A practical way to use your base weight list is to set a “weight budget” for categories. For example, you might aim for 3,000 g total for shelter + sleep + pack combined. If your current list shows a 1,200 g pack, a 900 g tent, and a 1,100 g sleep setup, that is 3,200 g before you even count water and food. That tells you exactly where to focus next. Photo estimates can help you sanity-check what you actually own, especially if you are sorting old gear bins or buying used items and need quick comparisons.
Prioritize upgrades by grams saved per dollar
Use one filter before you buy anything: grams saved per dollar. Start by identifying your top 5 heaviest items on your list (often pack, tent, sleeping bag or quilt, sleeping pad, and a big insulation layer). Then run one replacement scenario at a time. Example: swapping a 1,200 g pack to a 700 g pack saves 500 g (about 17.6 oz). If the replacement costs $250, that is 2 g saved per dollar. Another example: changing a 900 g tent to 600 g saves 300 g (about 10.6 oz). At $300, that is 1 g per dollar.
If a change saves less than 50 g but costs $50, that is a full dollar per gram. Focus first on changes that cut 200 to 600 g, because you will feel those on every climb.
Watch for false savings. A lighter shelter that vents poorly can force you into a warmer (heavier) quilt to stay comfortable. A tiny stove that sips fuel in summer might burn more canister fuel in shoulder season, and extra fuel quickly erases a 40 g stove “win.” Pack math also includes carry comfort: an ultralight pack that is 500 g lighter is not a win if it makes you add a 200 g foam back pad plus a 150 g hipbelt accessory to make it usable. The goal is fewer total grams, not just fewer grams in one line item.
How accurate is it to estimate gear weight without a scale?
Accurate enough for planning, not always accurate enough for bragging rights. If you use photo-based estimates as a screening tool, you can usually sort items into “heavy,” “medium,” and “light” quickly, then confirm only the finalists on a real scale. In practice, even a rough estimate that is off by 30 to 80 g still helps you make the right decision when the difference between two packs is 500 g. Use estimates to avoid overpacking fast, then weigh your full kit before a big trip.
What is the fastest grams to ounces for backpacking conversion?
For fast trail math, divide grams by 28 to get ounces (close enough for gear choices). Example: 560 g is about 20 oz because 560 ÷ 28 = 20. For exact conversions in your spreadsheet, use 1 oz = 28.349523125 g, which is listed in a NIST conversion table. A quick intuition builder: 454 g is about 1 lb, and 900 g is about 32 oz, which is about 2 lb.
How do I weigh camping gear at home if it is bulky or awkward?
Use a hanging method or subtraction. A $15 luggage scale works well for packs and food bags: clip the haul loop, lift until stable, and record grams or ounces. For bulky items like a bear canister or a full backpack, use the bathroom scale subtraction trick: weigh yourself, then weigh yourself holding the item, and subtract. If the item is floppy (like a quilt), put it in a lightweight stuff sack, estimate the sack separately, and subtract that too. For quick comparisons while sorting gear, photo-based estimates can help you decide what is worth weighing precisely.
Need to weigh something fast when you are packing, swapping gear, or shopping online? Download Scale for Grams and get an AI-powered weight estimate from a photo in seconds. It is a quick way to sanity-check specs, log your kit, and find easy weight wins without pulling out a scale. Grab it here: iOS.
Scale for Grams
Need to Weigh Something?
Download Scale for Grams and get an AI weight estimate from a photo in seconds.