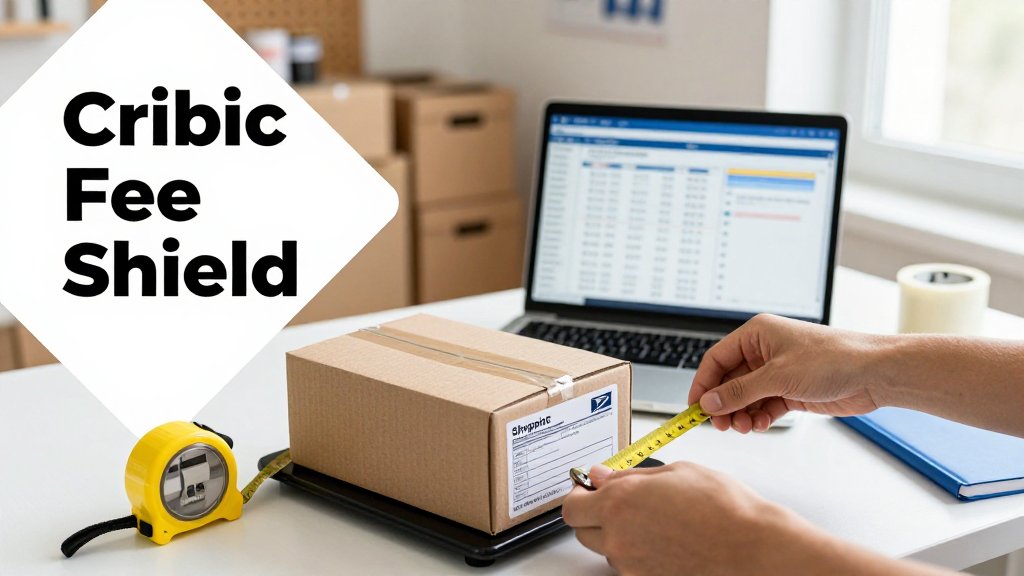
USPS Cubic Pricing Explained: Measure Boxes, Avoid Fees
USPS cubic pricing can lower costs for small, heavy packages, but a tiny measurement mistake can trigger postage adjustments. Learn how USPS compares dimensions vs weight, how to measure boxes correctly, and how to estimate weight fast so your labels stay accurate.
You drop a package at the post office, pay what looks right, then see a higher USPS charge after delivery and wonder what happened. In many cases, the culprit is cubic pricing and how your box dimensions affect billable weight, even when the scale number seems fine. This guide breaks down what USPS cubic pricing is, how to measure boxes correctly, when size pushes you into a pricier tier, and simple ways to estimate weight quickly when you do not have a scale.
What USPS cubic pricing is and why fees happen

If you have ever shipped a small box and later saw an extra charge, it usually was not random. USPS is pricing the real work of moving your package through trucks, planes, conveyors, and sorting machines. Two things drive that cost: how heavy the parcel is, and how much space it takes up. A 2 lb box that is the size of a loaf of bread is “cheap to move” compared to a big, light box that hogs room on a rolling container. That is the mental model that makes cubic pricing and postage adjustments click. USPS is not charging you for cardboard feelings, they are charging you for capacity. The surprise fees tend to happen when the label says one thing, but the package that gets scanned and weighed says another.
Cubic pricing in one sentence, plus when it helps
Cubic pricing is a rate method that uses package volume to price small packages, and it often rewards dense shipments that are heavy for their size. Think “small box, lots of weight.” Example: a 2 lb bag of coffee (about 907 g) in a tight 6 x 4 x 4 in box has a volume of 96 cubic inches, which is only about 0.056 cubic feet (96 divided by 1,728). That kind of shipment is exactly the sweet spot. Other real winners are a set of metal cookie cutters (surprisingly heavy, easy to keep compact) or a small jewelry order that includes a chain, clasps, and findings that weigh 8 to 14 oz but fit in a 5 x 4 x 2 in box.
Cubic pricing is not the same thing as “flat rate,” and not everyone will even see it as an option. In practice, cubic rates usually show up inside shipping software, shipping platforms, or commercial rate programs, not when you walk up to a retail Post Office counter with a box in hand. That is why one seller can ship a dense 3 lb box of bath bombs for a price that looks like a cheat code, while another seller with the same box pays a more typical weight based rate. If you are using an app like Scale for Grams to estimate product weight from a photo, it can be a useful gut check before you buy postage, but cubic pricing still hinges on entering accurate outside box dimensions.
Cubic pricing rewards tight packaging, but USPS will still verify the real box you mailed. Measure the outside, include bulges and tape, and round up consistently. A “close enough” measurement is exactly how adjustments happen.
Why USPS postage adjustments show up after delivery
Postage adjustments happen because USPS checks parcels with automated equipment, then compares what you paid for on the label to what the machines measured in real life. If your label says 8 oz and 8 x 6 x 2 in, but the system sees 12 oz and 8 x 6 x 3 in, USPS can bill the difference back to the account that bought the label. USPS describes this as its automated verification process, and it also warns that missing or inaccurate dimensions can trigger additional fees, including a dimension noncompliance fee, on some labels and services. You can read the plain language explanation on the USPS postage verification page.
Most adjustment stories trace back to the same measurement traps. One half inch sounds tiny, but it can push a parcel over a tier boundary (for cubic style pricing) or into a size category where dimensional rules apply. If you are shipping cookies, soaps, or meal prep snacks, this shows up when padding makes the box belly out. If you are shipping jewelry, it shows up when you reuse a small box that is slightly crushed, then tape “repairs” add height. If you are shipping fitness supplements, it shows up when you guess weight based on the label, but the packed jar plus dunnage is heavier than you think. Here are the most common mistakes that trigger adjustments:
How this relates to USPS Ground Advantage dimensional weight
For everyday shippers, USPS Ground Advantage is where size and weight surprises show up most often, because it is a common choice for small business orders and home shipments. Ground Advantage is usually straightforward when your box is compact, like 8 x 6 x 4 in with a 1 lb item. The risk zone is the big, light package, like a 18 x 14 x 8 in box with a 2 lb hoodie, or a large box of lightweight packing paper around a small candle tin. In cases like that, dimensional weight rules can make the billable weight higher than the scale weight. Cubic pricing is basically the opposite idea: it is designed to give a better deal when you keep the package volume small, even if the contents are dense. Either way, the best defense is the same: measure outside dimensions carefully, and do it before you click “buy label.”
Measure boxes correctly to avoid USPS adjustments
USPS does not measure your package the way your packing slip does. It measures the finished, sealed parcel, often with automated equipment that cares about the maximum outside size. That is why a label that felt “close enough” at your workbench can come back as an adjustment later. Before you buy postage, pack the item exactly how it will ship, close every flap, tape every seam, and then measure. If you are shipping a bakery box with a paper overwrap, a meal prep bundle with a liner bag, or a jewelry gift box inside a mailer, the outside layer is what counts. Think like a scanner: it sees the longest point in each direction, not the neat inside dimensions printed on the box.
The outside measurement rule that saves you money
Measure the outside of the fully packed package at the longest points, corner to corner, edge to edge. Do not measure the inside, and do not measure an empty box. A common slip is grabbing the “12 x 9 x 4” printed on a carton, then discovering the outside is closer to 12.5 x 9.5 x 4.25 after it is packed and taped. USPS also expects you to round measurements to whole inches for common parcel calculations, which is called out in its parcel size fee standards. If your numbers are smaller than what USPS records, you can get billed the difference later, plus you lose the predictability you need for margins.
Squishy packages need extra honesty. If a poly mailer can bulge, assume the bulge is the dimension. For example, a small business shipping two silicone meal prep containers in a 10 x 13 poly mailer might think the “height” is 2 inches, until the corners puff up to 3 inches once taped. Measure after you add the packing paper, bubble wrap, or air pillows, then press only lightly with the tape measure so you do not fake a smaller size. For rounding, do not round down. If you must choose a whole inch in a shipping tool, rounding up keeps your label from being underpaid. Mini example: if a box is truly 12.25 inches long, entering 13 inches is the safer choice in many label workflows.
Watch the “invisible extras” that change cubic tiers. Bakery orders are notorious for this: a 10 x 10 x 5 cake box can become 10.5 inches tall if you add a corrugated pad under it, then tape across the top so the tape ridge sits proud of the cardboard. Meal prep shipments have similar surprises when you add an insulated liner, a gel pack, and then cinch the outer box tight, which can bow a panel outward. Jewelry makers get caught when they slide a rigid 6 x 4 x 2 gift box into a bubble mailer and the seam creates a hump that is thicker than the box itself. The simple habit is this: measure the final parcel, not the components, and re-measure any time you change the packing method.
Box choice for dense items: smaller is usually cheaper
Dense items reward tight packaging. Picture a 3 lb set of stainless baking weights (or a single heavy candle in a glass jar). You could ship it in a roomy box “just to be safe,” like 12 x 10 x 6, which is 720 cubic inches. Or you could right-size to a sturdier small carton, like 8 x 6 x 4, which is 192 cubic inches. Same 3 lb item, but the smaller box takes about one quarter of the space. Under cubic style pricing, those inches matter, because a tiny change can bump you into a higher cubic tier, even though the actual weight is unchanged. The smaller box also needs less void fill, so you are not paying to ship crumpled paper.
The common mistake is upsizing so you can add more padding, then getting hit by a bigger billed size. A better approach is to keep the box small and upgrade the protection: use a stronger corrugated box, add a snug cardboard insert, or wrap the item with a consistent 0.5 to 1 inch cushion that does not create a weird bulge. For jewelry, that can mean a rigid 6 x 4 x 2 mailer box with a foam insert instead of tossing the same gift box into a puffy mailer that expands unpredictably. For bakery items like brownies, a tight mailer box plus a thin corrugated pad can protect corners without increasing outside height. Right-sizing is not about “less protection,” it is about controlled protection that stays within your measured dimensions.
Estimate shipping weight fast without a scale
If you print shipping labels at home but do not own a scale yet, you can still get close enough to avoid most postage adjustments. The key is to estimate in a repeatable way and to be slightly conservative. USPS pricing is sensitive to both weight and dimensions, and automated scans can flag a package that is heavier than the label, bigger than the label, or both. That is how a “cheap label” can turn into a surprise charge later. Your goal is not perfect precision on every box, it is consistent accuracy that keeps you on the safe side of the next ounce or pound break, especially for small, dense packages like jewelry, spices, cookies, or protein sample packs.
A quick accuracy target that prevents most surprises
Use this rule of thumb and you will avoid most “postage due” headaches: aim to overestimate by 1 to 2 oz for light packages (anything you think is under 1 lb), and by 2 to 4 oz for heavier packages. Overestimating is usually safer than underestimating because it reduces adjustment risk during label audits, while the cost difference is often small. Example: if your cookie box truly ships at about 14.3 oz, labeling it as 15.5 to 16 oz is typically cheaper than getting bumped after the fact. The same idea helps a jewelry maker shipping a 3.8 oz padded mailer: label at 5 oz and move on.
To make estimating fast, build a mini reference system from real shipments. Pick your 3 most common “sets” and record their packaging weight once, then reuse those numbers. For example: a 10 in x 13 in poly mailer plus label might be about 0.8 to 1.2 oz, a 6 in x 4 in x 4 in corrugated box might be about 2.0 to 3.0 oz, and a small handful of packing paper might add 0.5 to 1.5 oz depending on how tight you crumple it. Add tape too, because two extra passes around a bulging seam can add noticeable weight over time. Save these as a note called “My packaging weights” so every label takes seconds.
> If you are estimating, do not chase perfect. Pick a repeatable method, add the weight of your usual box, padding, and tape, then round your label up by a couple ounces to stay clear of postage adjustments.
Why did USPS change my postage after shipping?
USPS compares what you entered on the label to what their equipment measures during processing, including both dimensions and weight. If your label understates either one, you can get a postage adjustment (often routed to you by Etsy, eBay, Pirate Ship, ShipStation, or another platform). Today’s fix is simple: confirm your entered dimensions match the outside measurements of the taped box, confirm your entered weight includes the box, padding, label, and tape, and recheck after taping for bulges that change the “real” size. If you want the official overview, USPS explains the process on their USPS postage verification page.
Is USPS Ground Advantage dimensional weight the same as cubic pricing?
They are related, but not identical, and mixing them up can cause label mistakes. Dimensional weight is a billing method that converts your package size (length x width x height) into a “billable weight,” then charges whichever is higher, billable weight or actual weight. Cubic pricing is a volume-based rate structure for smaller packages that some shippers access through approved postage providers, and it is still driven by dimensions plus distance. Practical takeaway: if your box gets bigger, your cost risk rises even if the actual pounds stay the same. Action you can take today: price the same order in your software using two box sizes and the same weight, then pick the smaller box before you buy 25 more.
How can I estimate shipping weight without a scale and still be accurate?
Use a two-part workflow: estimate contents, then add known packaging. Start by taking a clear photo of the item (or food portion) and using Scale for Grams on iOS to get a fast estimate for the contents in grams or ounces. Then add the packaging weight from your personal cheat sheet, for example 2.5 oz for your small box, 0.8 oz for a poly mailer, plus 1.0 oz for bubble wrap and tape. Finally, round the label weight up. Example: if your photo estimate says 210 g of homemade granola (about 7.4 oz) and your pouch plus label is 1.1 oz, ship it as 10 oz, not 8.5 oz.
Stop estimating and find a real scale when any of these become true: you ship more than a few packages per week, you regularly land near price breaks (15.9 oz vs 1 lb, or 1.9 lb vs 2 lb), you ship high-value jewelry where disputes are painful, or your boxes are large enough that size-based billing becomes likely. A basic digital kitchen scale is often enough for small parcels, but a postage scale with a larger platform makes odd-shaped boxes easier. Even if you keep using photo estimates for quick prep, weighing the final taped package once will catch the sneaky stuff, like extra void fill, a heavier roll of tape, or a box that bulges into a bigger measured size.
Need to weigh something fast before you ship? Download Scale for Grams and get an AI-powered weight estimate from a photo in seconds, so you can choose the right box and avoid surprise adjustments. It is a quick way to sanity-check your numbers when a scale is not handy. Get it here: iOS. Try it now and ship with more confidence.
Need to Weigh Something?
Download Scale for Grams and get an AI weight estimate from a photo in seconds.