Thrift Outlet Pay by Pound: Estimate Cart Weight
Goodwill Outlet and other pay-by-the-pound thrift stores make pricing feel like a guessing game. This guide shows simple ways to estimate your cart weight and total cost fast, including a photo-based workflow with Scale for Grams when you do not have a physical scale.
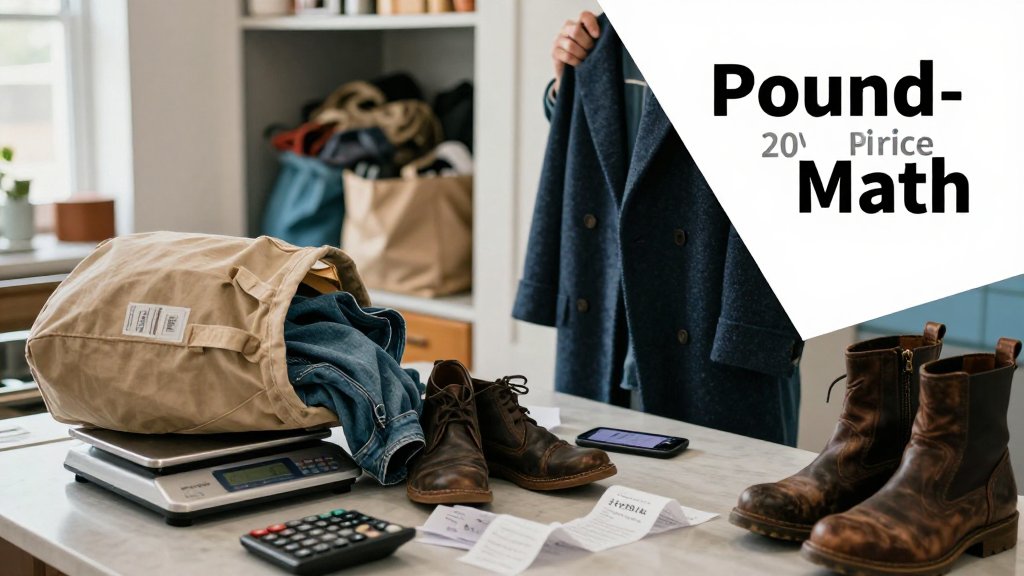
If you love thrift outlets, the bins can feel like a treasure hunt until the register turns your “great deal” into a surprise total. Pay-by-pound pricing moves fast, and guessing wrong can mean overspending or walking away from pieces you actually wanted. In this guide, you will learn simple ways to estimate cart weight before checkout, including quick hand-and-bag comparisons, common item weight benchmarks, and a phone-photo workflow that helps you get close. Prices vary by location and category, so the goal is a reliable estimate that improves buy-or-pass decisions.
How pay-by-the-pound pricing works at the bins
Walk into a thrift outlet (the “bins”), and the biggest difference you will notice is that your total is based on weight, not how many items you grabbed. At checkout, your cart gets weighed and the cashier multiplies that weight by the posted price per pound. Pricing is not universal, even within the same thrift brand. Some outlets use one flat per-pound price for most categories, while others split it up (soft goods like clothing and linens vs hard goods like housewares or electronics). For a concrete example of how specific it can get, one Goodwill outlet pricing board lists different rates for categories like wares and textiles, plus separate rates for glass and breakables, and even per-item pricing for books and media on the same sign (Goodwill outlet pricing example).
Here is the sneaky part: the bins reward light, fluffy volume and punish dense, heavy picks. Picture a cart that looks like a cheap win, mostly “boring basics” in a heap. You toss in six pairs of jeans, a couple of wool coats, three pairs of shoes, and a hoodie because it is “just one more.” The cart does not look full, but it is suddenly a rock. If your outlet is around $1.99 per pound, 25 lb rings up near $50 before tax. That is how a cart that felt like “maybe $20” becomes a surprise total when denim and footwear are doing most of the weighing.
The pricing math you can do in your head
Use this rule as your checkout shortcut: estimated total cost equals estimated pounds times price per pound (then add tax). If you are unsure about weight, bracket your estimate so you can live with the worst case. For example, if the posted price is $1.79 per lb and your cart might be 18 to 24 lb, do two quick totals: 18 x 1.79 is about $32, 24 x 1.79 is about $43. Add sales tax after that, and you have a realistic range before you get in line. Also, some outlets round weight differently (by the tenth of a pound, by the quarter pound, or by their register settings), so treat this as an estimate, not an invoice.
Before you commit to a big pile, do a quick pounds check in your head. A cart that looks like $10 can ring up $35 if it is mostly denim, coats, and shoes.
Category pricing is where your estimate can drift, so build a simple mental “default.” If your outlet has separate prices, assume your whole cart is in the most expensive common category unless you are confident the cashier will split it. Using that same Goodwill outlet pricing board example, the sign shows per-pound pricing for broad groups like wares and textiles, plus a cheaper per-pound rate for glass and breakables, and a separate per-item rate for books and media. If you have a mixed cart (clothes, dishware, and a toaster), your safest estimate is to price everything at the higher per-pound rate, then treat any cheaper category as a bonus discount at checkout. This keeps your budget from getting surprised by “just a few heavy hard goods.”
Bins weight traps: what makes a cart feel lighter than it is
The mindset shift is simple: volume is not weight. A huge pillowcase of thin T-shirts might be 6 lb, while three pairs of jeans can hit that by themselves. Anything dense, layered, wet-feeling, or hardware-heavy is a likely weight trap. If you are shopping with a cost target in mind (like staying under $25 total), touch-check your cart occasionally. Lift one corner of the pile. If it feels like a gym sandbag, do the math again before you add more. This is especially useful for small business shipping or jewelry makers, where “a few extras” can change your margins fast.
If you want a quick “should I keep this?” check without a physical scale, think in grams and convert. One pound is about 454 g, so 2,500 g is roughly 5.5 lb. At $1.79 per lb, that one dense bundle could be about $9.85 before tax. That conversion trick also helps outside the bins: home bakers portioning dough, fitness folks eyeballing meal prep, and sellers estimating shipping tiers. If you already use photo-based estimating for food portions, the same habit applies here. For portion-style estimation techniques, see palm-based macro tracking tips, then reuse the same “estimate, bracket, decide” approach for thrift outlet checkout math.
Estimate pounds in a cart without a scale
In a thrift outlet, the best time to estimate cart weight is while you are still building the pile, not when you are already in line and second-guessing everything. A repeatable routine keeps you calm and helps you decide, in the moment, if one more hoodie is worth it. Here is the workflow that actually holds up on busy bins days: (1) pick one “anchor” item you can recognize by feel, (2) estimate your cart in bundles, not item by item, (3) do one quick sanity check based on material and “hidden weight” categories like shoes and hard goods. You are not trying to be perfect, you are trying to be consistently close enough to avoid sticker shock at checkout.
Fast calibration: pick one item you can recognize by feel
Start with a calibration item you can “weigh” in your hands without thinking too hard. A men’s medium cotton T-shirt is often around 0.3 to 0.5 lb, so if it feels like a standard tee (not heavy graphic, not oversized, not wet), you can mentally tag it as 0.4 lb and build from there. Denim and canvas swing heavier than knits, so do not use a tee to estimate jeans or a jacket. A pair of adult jeans is often around 1.2 to 2.0 lb, a hoodie can be 1.0 to 2.5 lb, and a sneaker is often 0.6 to 1.2 lb each. Consistency matters more than precision.
The trick is to “lock” your anchor for that trip and stick with it. If you decide your tee is 0.4 lb today, keep using 0.4 lb even if you pick up a couple that feel slightly heavier. You can correct at the end with a sanity check instead of constantly changing your math. If you do not have a tee handy, use a different anchor you trust: one adult hoodie at about 1.8 lb, or one pair of jeans at about 1.6 lb. The goal is a stable measuring stick so you can make fast decisions like, “This pile is roughly 12 tees, that is about 5 lb,” without overthinking every seam and tag.
Bundle method: estimate by bags, stacks, or categories
Once you have an anchor, stop counting “items,” and start counting “bundles.” In a cart, bundles usually look like: all tees, the denim pile, outerwear, shoes, and hard goods (mugs, books, small appliances, toys). Each bundle gets one simple multiplier. You can even use your reusable shopping bag as a container and treat it like one bundle at a time. This is the same idea small business shippers use when they rough-estimate package weights before taping a box. The bundle method is also faster in the aisle because you can re-sort in 10 seconds: toss all tees together, stack jeans, pair shoes, and you instantly see where the weight is hiding.
Here is a realistic cart math example you can copy: 10 tees at 0.4 lb each is about 4 lb. Add 4 jeans at 1.6 lb each, that is about 6.4 lb. Add 2 hoodies at 1.8 lb each, that is about 3.6 lb. Total so far is about 14.0 lb. Now add shoes carefully: one pair of sneakers can easily be 1.2 to 2.4 lb per pair, so two pairs might add 3 to 4 lb even though they do not look “big.” If you tossed in 3 hardcover books (often roughly 1.0 to 2.5 lb each depending on size) you can add another 4 to 5 lb fast. This is why categories beat guessing.
A common bins mistake is underestimating small-looking, dense items. Belts, for example, can feel light in your hand, but a pile of 8 to 12 leather belts adds up quickly, especially with big buckles. Shoes are the other usual culprit because there is rubber, foam, and sometimes heavy insoles, plus you are counting “pairs” but the cart is holding four separate heavy objects. Hard goods sneak in the same way: one ceramic mug might be around 0.7 to 1.0 lb, but five mugs wrapped together can be a surprise 4 to 5 lb. If your goal is a low-cost cart, consider setting a personal rule like “no more than two pairs of shoes” or “one hard-goods bag,” then estimate that bag as a single heavy bundle.
Finish with a quick sanity check that takes under 15 seconds: ask, “What is my cart mostly made of?” If it is mostly knits (tees, thin leggings, light jerseys), your estimate is usually close. If it is mostly denim, canvas, or thick fleece, bump your total up. Wet items also throw everything off, so if something feels damp, treat it like it weighs more and decide if it is worth keeping. If you are shopping to resell and ship, this sanity check helps you avoid loading up on dense items that cost more to mail than they are worth. For a reality anchor, USPS Priority Mail flat rate packaging has a USPS 70-pound limit, which is a reminder of how quickly dense materials can climb. If you want a second opinion before checkout, snap a quick photo of a bundle and use an app like Scale for Grams to estimate weight in ounces or grams, then convert to pounds for your cart total.
Use phone photo estimates to predict checkout cost
At a thrift outlet, you usually cannot weigh your cart item by item. That is exactly where a photo-based estimate helps. With Scale for Grams on iOS, you can snap a quick photo of what you are planning to buy (or ship, portion, or sort), get an estimated weight in grams, ounces, or kilograms, then convert it into pounds to predict what the register will do to your total. It is not a lab measurement, but it is fast, consistent, and good enough for decisions like “keep digging” vs “stop, this is getting heavy.” The win is speed, not perfection, especially when a physical scale is not available.
Once you have an estimated weight, tie it directly to your price per pound strategy. Example: if your outlet charges $2.49 per lb and your cart photo estimate comes out to 6.2 lb, your predicted checkout cost is about $15.44 (6.2 x 2.49). If you are a reseller, that number is your “inventory buy-in.” If you bake by weight, it is your “ingredient stash” cost per batch. If you ship packages, it is your “can I still use First-Class style pricing tiers” gut check before you even tape the box. Build in a cushion, like 10 to 20 percent, so you do not get surprised by a heavier-than-expected load.
A simple photo workflow that improves accuracy
Better photos reduce bad estimates. Aim for bright, even light (near a window or under strong ceiling lights) so the edges of the object are clear. Keep the whole object in the frame, hold your phone level (not tilted sharply), and avoid extreme wide-angle shots that stretch the corners. A plain background helps a lot, like a solid table, a blank wall, or the flat bottom of your cart. If items overlap, separate them into two photos instead of one tangled pile. At the bins, this is practical for a bag of jewelry findings, a stack of folded tees, or a small box you plan to ship, because each one has clean boundaries that a camera can “see” consistently.
After you get the estimate, make it actionable by translating it into a checkout plan. Say you photograph a gallon zipper bag of mixed craft jewelry parts and the estimate reads 320 g. That is about 0.7 lb, so at $1.79 per lb you are in the $1.25 range, which is a low-risk buy for flipping as lots. For folded tees, photo one stack of five, then a second stack of five, so you can stop when you hit your target cost (for example, “I want to stay under $18 today”). For shippers, photo the packed box before you tape it, and if it estimates 2 lb 4 oz, you know you are flirting with a higher shipping tier. That is your cue to resize the box or remove filler before you pay for extra weight.
Use the estimate as a decision tool, not a verdict. If your photo says 5 lb, plan for 5.5 lb at checkout. That small buffer keeps your cost-per-pound math realistic while you shop fast.
FAQ: Thrift outlet weight, cost, and accuracy questions
These questions come up constantly at pay-by-the-pound outlets because weight is the price tag. A phone photo estimate is most useful when you treat it like a map, not a receipt. Use it to compare options (heavy blankets vs light jackets), to cap your spend (stop adding items when your estimate hits 10 lb), and to plan resale margins (if you need a 4x return, do not let the cart creep up quietly). The more consistent your photo setup is, the more consistent your results will be across trips, which is what you really want for a repeatable sourcing routine.
How accurate is a phone photo weight estimate for a thrift haul?
Expect “close enough to budget,” not “exact to the ounce.” For a typical thrift haul photo, a practical goal is staying within about 10 to 20 percent, especially with mixed materials. If your estimate says 8 lb, plan your checkout math using 9 lb so you have breathing room. Accuracy improves when you estimate in smaller batches, like two sweaters per photo instead of a full cart, and when you avoid messy piles. For resellers, that level of accuracy is often enough to protect margin, because it prevents accidental heavy buys like soaked denim, dense books, or bulky bedding.
What thrift items are easiest and hardest to estimate by weight?
Easiest: items with clear outlines and consistent density, like folded T-shirts, jeans laid flat, boxed items, shoes photographed as a pair, or a sealed bag of hardware. These let you frame the full shape cleanly. Hardest: fluffy or irregular items (puffer coats, comforters, faux fur), shiny reflective objects (mixed jewelry piles), and anything overlapping in a heap. Liquids and partially filled containers can also be tricky because a photo cannot “see” internal fill level. If you are estimating jewelry for making, spread pieces in a single layer or estimate the bag plus a second photo of the emptied contents to reduce overlap.
How do I convert pounds to grams or ounces for pricing and shipping?
Use a couple of anchor conversions and you can do most thrift and shipping math in your head. One pound is exactly 453.59237 grams (so 2 lb is about 907 g, and 5 lb is about 2268 g) based on the NIST definition. One pound is also 16 ounces, so if a box is 3 lb 8 oz, that is 3.5 lb total. Going the other direction, 250 g is a little over half a pound (about 0.55 lb), which is handy for jewelry makers pricing findings by the bag and for shippers checking whether a parcel is creeping toward the next label bracket.
Need to weigh something fast before you commit to a cart full of finds? Download Scale for Grams and get an AI-powered weight estimate from a photo in seconds. It is a practical way to sanity-check your thrift outlet haul when you do not have a scale nearby. Grab the app here: iOS, then try it on your next bins trip and shop with more confidence.
Need to Weigh Something?
Download Scale for Grams and get an AI weight estimate from a photo in seconds.