Phone Scale Apps: 9 Myths That Ruin Accuracy
Phone scale apps can be surprisingly useful, but common beginner mistakes make results feel random. This myth-busting guide explains what actually affects photo weighing accuracy, how to fix inconsistent estimates fast, and when you still need a real scale.
Phone scale apps can be surprisingly useful, but they can also feel wildly inconsistent when the number changes every time you try. The good news is that most accuracy problems come from a few repeatable mistakes, not from your phone being “bad” at weighing. In this article, you will learn the nine common myths that quietly ruin photo-based estimates, from choosing the wrong reference object to dealing with glare, tilt, and unit confusion. You will also get quick fixes for baking, shipping, and small business tasks.
Why phone scale app estimates feel inconsistent
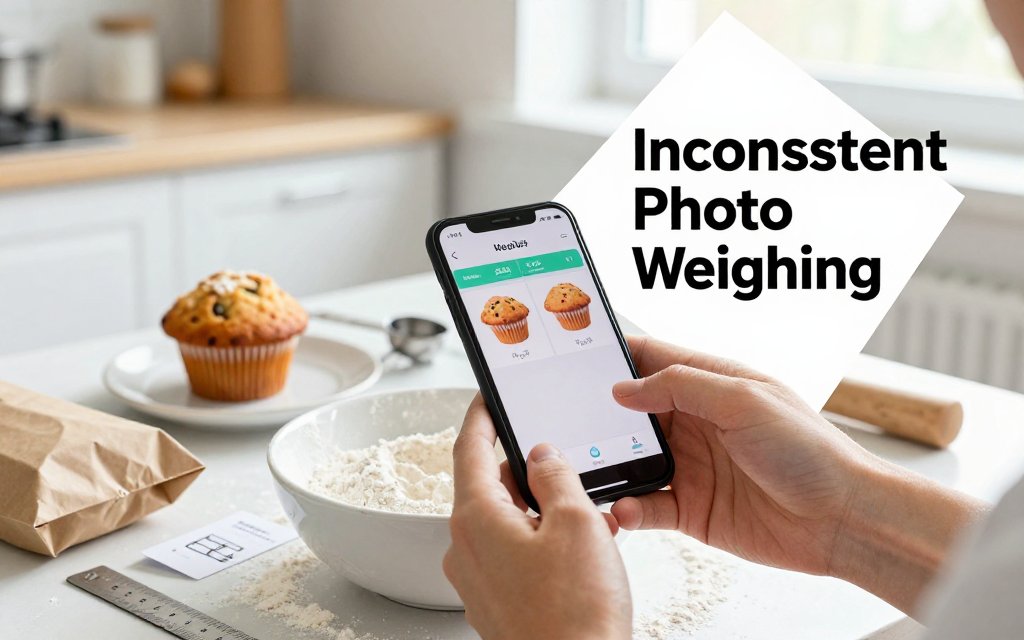
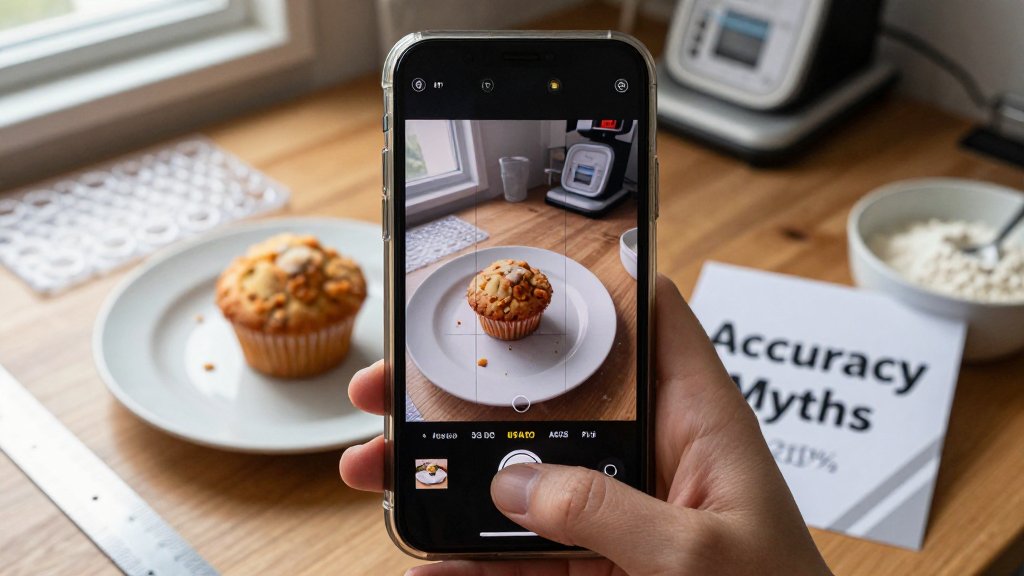
Photo-based weighing works by turning your picture into measurements. The app detects your item’s outline, compares it to a known reference size, estimates volume from what the camera can “see,” then converts that volume into a weight estimate using typical density for that material or category. That is why results can vary: tiny changes in perspective change the pixel-to-real-world scale, and tiny changes in lighting can change where the edges of the object appear. If one photo makes a muffin look 10% wider than it really is, the volume estimate can swing a lot, and your estimated grams swing with it.
Most “inconsistent” results come from setup mistakes you can fix in under a minute: angle, distance, and reference choice. Picture this: you’re baking and need 120 g of flour for a small batch of pancakes, but your phone estimate jumps between 105 g and 145 g. Or you are shipping a bubble mailer and trying to stay under 8 oz, but one photo says 6.9 oz and the next says 9.1 oz. Before you blame the app, lock down your photo routine. For shipping, it also helps to understand how dimensions and package size can affect what you pay, especially with USPS cubic pricing basics.
Myth 1: Any camera angle works fine
Tilt is the fastest way to throw off an estimate because it changes perceived size and thickness at the same time. When the phone is angled, the “near” edge of a plate looks bigger than the far edge, and a flat item like a tortilla can start to look slightly domed because of shadows and perspective. Practical rule: keep the phone level, centered, and parallel to the surface. Your camera lens should be directly above the item, not off to the side like you are taking a glam shot for social media. If you want repeatable results, repeatable geometry matters.
Here is a fast self-check that takes two seconds: if the plate looks oval instead of round, you are angled and accuracy drops. The same goes for shipping photos, if a rectangular mailer looks like a trapezoid, your camera is tilted. Fix it by raising your elbows, holding the phone with both hands, and squaring up your shot so edges look straight and corners look like corners. If you are weighing flour, spread it into a flatter mound on a small plate instead of leaving it heaped in a deep bowl, because steep sides hide volume from the camera and exaggerate the impact of angle.
A phone scale app is not guessing at weight, it is measuring pixels. Keep the camera parallel, keep the reference on the same surface, and keep framing consistent. Do that, and repeat photos get repeat estimates.
Myth 2: The reference object does not matter much
The reference object is the anchor, it tells the app what “one inch” or “one millimeter” looks like in your specific photo. A random coin, a key, or a bottle cap is risky because sizes vary, and even small errors get magnified when the app scales your whole scene. Better options have known, consistent dimensions. A standard credit card is a great pick because it is flat and easy to place, and a US quarter is also dependable. The U.S. Mint coin specs list a quarter’s diameter as 24.26 mm and thickness as 1.75 mm, which makes it a solid “known-size” reference.
Placement matters just as much as the object you choose. Put the reference on the same plane as the item, side-by-side on the table or tray, not behind it and not propped up. If the quarter is on the countertop but your food is on a raised plate, the camera sees them at different heights, and the scale gets muddy. Avoid partially covering the reference with the object, and avoid glossy references that create glare, since edge detection can drift. For jewelry makers photographing a pendant, set the pendant and reference on the same flat mat. For shipping, place the bubble mailer and reference on the same surface, then smooth wrinkles so the outline is clean.
Myth 3: Getting as close as possible is always best
Distance affects distortion and consistency. Very close shots can warp edges (especially on wide-angle phone lenses), and that makes a cookie look wider at the edges or a small box look “puffed” toward the camera. Instead of hovering inches away, back up until the item and the reference are fully in frame with a little breathing room around them. Then keep that distance consistent for repeat photos. If you need 30 g of walnuts for meal prep, a consistent overhead distance helps your “30 g” look like “30 g” every time you retake the photo. If you are estimating a 12 oz mailer, a consistent framing helps avoid sudden jumps when the corners get distorted.
Once you treat the photo like a measurement, not a snapshot, estimates get noticeably steadier. Pick one reference you always use, keep it clean and flat, and build a quick habit: level phone, same distance, good light, and reference on the same surface. If you use Scale for Grams for baking, you can even set up a “photo spot” on your counter with a small matte board and a dedicated reference card, which makes your flour, rice, and portion estimates repeatable. For shipping, take photos on the same table under the same lamp. Consistency beats perfection, and it takes less than a minute to set up.
The photo conditions that secretly skew weight
If a phone scale estimate feels “random,” it is usually not the math, it is the photo conditions changing from shot to shot. Your goal is not a perfect studio photo. Your goal is a repeatable setup where the app sees the same kind of light, the same kind of background, and the same kind of edges every time. Pick one spot (a counter, desk, or packing table), keep the camera angle consistent (straight down works best), and keep the distance consistent (for small items like earrings or spices, about 10 to 14 inches above the surface is a practical starting point). Then keep the surface clean so outlines stay crisp.
Keep lighting “bright and even,” but also keep it stable. A simple rule: use one lighting type at a time. If you have a sunny window plus warm kitchen bulbs, your phone may correct white balance differently on each photo, and small color shifts can change where the edge detector thinks the object ends and the background begins. For repeatability, either turn off overhead lights and use window light only, or close blinds and use lamps only. Also watch shadows: if the shadow edge looks razor sharp, the light is probably too harsh. If the shadow looks soft and you can still see surface texture inside the shadow, you are in a safer zone for consistent outlines.
Myth 3: Brighter light is always better
“More light” helps only until it starts blowing out detail. Overexposure is sneaky because the photo still looks clear to you, but shiny spots become pure white, and pure white means missing information. That is exactly what happens on a 2.5 g gold ring, a 12 g pendant, or a watch with a glossy crystal, where glare can wipe out the true outline. It also happens on shipping photos: a box corner with clear tape can reflect a lamp and make the tape look like part of the cardboard, which can change the perceived footprint. A practical check: if you cannot see any texture in the brightest area, back off brightness slightly or tap to expose for the shiny area.
A usable setup for most kitchens and packing tables is indirect window light (bright shade, not direct sun) or two lamps placed left and right at about a 45 degree angle. Use bulbs around 800 to 1100 lumens each, and start with the lamps about 12 to 18 inches from the item, then move them back if you see harsh hotspots on tape, jewelry, or glossy wrappers. Avoid on-camera flash and avoid a single overhead spotlight, since both tend to create a hard shadow line that can be misread as an edge. If you need extra softness, a small DIY diffuser helps, even a sheet of white paper or parchment held between the lamp and the object. If you want the concept explained visually, light tent basics are a good reference for why diffusion reduces harsh reflections and shadows.
Myth 4: The background color is irrelevant
Background is not decoration, it is the contrast boundary that helps the app find the object’s edges. High contrast and low texture usually wins. Good options are a plain cutting board, matte white printer paper, or a solid silicone mat. Try to avoid patterns, speckles, and shine. A busy granite counter can create dozens of false “edges” near your item. A plaid towel can confuse the outline of a bag of flour or a bar of soap. A reflective metal tray can mirror a window and make the item look bigger or oddly shaped. Match background to the item: dark chocolate or coffee beans pop on white paper, while white flour, sugar, or rice reads better on a darker board.
Some materials need extra care because the background literally shows through them. If you are estimating something inside a translucent deli cup, a frosted supplement bottle, or a thin plastic bag, the camera sees a mix of object color and background color. That can make the “true edge” look fuzzy. The fix is simple: put a single, matte sheet under the whole setup, and keep it consistent. Poster board works well for shipping parts and small products. For food portions, a solid silicone mat or a plain plate is better than a reflective baking sheet. Also create separation: move the object 3 to 6 inches away from any background seam or wall shadow, so the only strong boundary in frame is the object itself.
Repeatability beats “perfect.” Build a tiny routine you can do in 15 seconds: same spot, same background, same lights, same camera height, then take two photos and compare. If one photo looks slightly warmer or has a darker shadow, use the other one, or retake until they match. Tricky shapes deserve extra consistency: for heaped powders like 30 g cocoa or a 40 g scoop of protein powder, level the top instead of leaving a peak, since the peak can change the silhouette a lot without changing weight much. For jewelry, lay pieces flat with clasps closed, and keep reflective stones angled away from direct lamp reflections. Those small habits keep your estimates steadier from day to day.
Myths about units, conversions, and real-world use
Unit mix-ups are one of the fastest ways to think a phone weight estimate is “wrong” when it is really just being interpreted wrong. For baking, grams are usually the safest choice because they avoid fractional ounces and the rounding that sneaks in when you convert. Example: if an app estimates 4.2 oz of flour, that is about 119 g. If you mentally round it to “about 5 oz,” you just jumped to about 142 g, which can noticeably tighten a dough. For shipping, ounces and pounds matter because carrier price tiers often change at clean cutoffs like 8 oz, 12 oz, and 16 oz. Your goal with a photo-based estimate should be consistency and a correct decision, not a perfect match to a lab scale reading every time.
Myth 5 to Myth 9: It should match a real scale every time
Myth 5 says “tare is automatic,” but your camera cannot magically subtract the weight of your bowl, plate, or mailer. If you snap a photo of 180 g of yogurt in a 310 g glass bowl, the best estimate may lean toward the combined 490 g because that is what the image shows. Practical fix: do two quick shots, one of the item alone (or as close to alone as possible), then one of the empty container. Subtract them yourself. Shippers can do the same with packing materials: take one photo of the empty padded mailer (often 20 g to 40 g), then another after you add the product. That single step prevents “mystery weight” from plates, trays, or mailers from turning into a real pricing mistake.
Myth 6 says “heaped ingredients are fine,” but mounds are wildly inconsistent. A level tablespoon of flour might be around 8 g to 10 g, while a heaped spoon can jump to 15 g to 20 g depending on how you scoop. In a cookie recipe that calls for 200 g flour, being off by even 20 g can push you from chewy to dry. Myth 9 says “rounding does not change decisions,” yet it absolutely can. If your package is really 15.9 oz and the app shows 15 oz after rounding, you might buy the wrong label. For baking, choose grams and keep one decimal place when you can. For shipping, treat estimates near cutoffs as a warning and re-shoot if two photos differ by more than 5%.
Myth 7 says “small items are easiest,” but tiny jewelry is often harder because the camera needs a clean, close reference and sharp edges to judge size and volume. A 2 g earring back, a 5 g thin silver ring, or a 0.7 g gemstone can take up only a small patch of pixels, especially if you shoot from too far away. Myth 8 says “packaging weight does not matter,” but it adds up fast. A shipping label can be 2 g to 5 g, a strip of tape can be another few grams, and filler can range from 10 g (a bit of tissue) to 200 g or more (bubble wrap plus kraft paper in a small box). Practical fix: fill the frame with the item, use bright light, and keep packaging in a separate step so you can estimate product weight first, then add packing weight intentionally.
FAQ: Fast answers for better photo weighing accuracy
These apps are best for fast estimates and quick decisions, like “is this portion closer to 120 g or 170 g?” or “am I probably under 1 lb once I add a label?” They are not a replacement for a certified, legal-for-trade scale used to sell by weight. Commercial scales used in regulated transactions are typically expected to meet requirements described in resources like the NIST Handbook 44 standards. Your best quick check is repeatability: take two photos from the same height and angle. If the estimate swings more than 5%, fix the photo setup (lighting, reference, framing) before you trust the number.
How accurate are phone scale apps for food in grams and ounces?
Expect “close enough for choices,” not “perfect for baking competitions.” For food, grams usually feel more accurate because you avoid repeated oz-to-g conversions and rounding. Step-by-step fix: (1) switch the app to grams, (2) place food on a plain plate, then take a second photo of the empty plate to subtract it, (3) re-shoot once from the same height to confirm you are within about 5% of the first estimate. Realistic expectation: great for portion tracking (like 150 g chicken vs 200 g), not legal-for-trade accuracy and not a substitute for a kitchen scale when a recipe is very sensitive.
Why does camera angle change the weight estimate so much?
Angle changes size perception. A shallow angle can make a bowl look taller or wider than it is, which can change the estimated volume and therefore the estimated weight. Step-by-step fix: (1) shoot as close to straight down as your app recommends, (2) keep the phone at a consistent height, like 12 inches above the surface, (3) include your reference object fully in frame, and (4) avoid wide-angle distortion by not shooting from the very edge of the lens. Realistic expectation: photo estimates can vary shot to shot, so treat large swings as a signal to redo the photo, not as the item “changing weight.”
What is the best reference object for photo weighing?
Pick something flat, rigid, and standard, then use it the same way every time. Step-by-step fix: (1) use a credit card or ID-1 sized card as your reference, (2) place it on the same surface plane as the item, right next to it, (3) keep both fully visible with sharp edges, and (4) avoid soft references like a napkin, a bent paper scrap, or your hand, which changes shape. Realistic expectation: a good reference improves consistency, especially for small objects like jewelry, but it still does not turn a phone into a certified scale for selling by weight.
Need to weigh something fast right now? Download Scale for Grams and get an AI-powered weight estimate from a photo in seconds. It is a simple way to sanity-check portions, package weights, and small items when a traditional scale is not nearby. Try it today on iOS, and see how much more consistent your results can be with the right setup and a quick snapshot.
Scale for Grams
Need to Weigh Something?
Download Scale for Grams and get an AI weight estimate from a photo in seconds.