Will This Spool Finish the Print? Filament Estimation
Learn reliable ways to estimate how many grams or meters of filament are left on a spool and whether it will finish your next print, even if you do not own a scale. Includes quick math for 1.75 mm filament, density cheats, and photo-based estimating tips.
Nothing sinks a 3D printing mood like watching a long print run out of filament with just a few layers left. Before you hit Start, you need a confident answer to one question: will this spool finish the job? In this guide, you will learn practical ways to estimate what is left by using simple math, reading spool and material specs, and even doing a photo-based weight estimate when you do not have a dedicated scale. Spend less time guessing and more time printing.
Can this spool finish your print today?
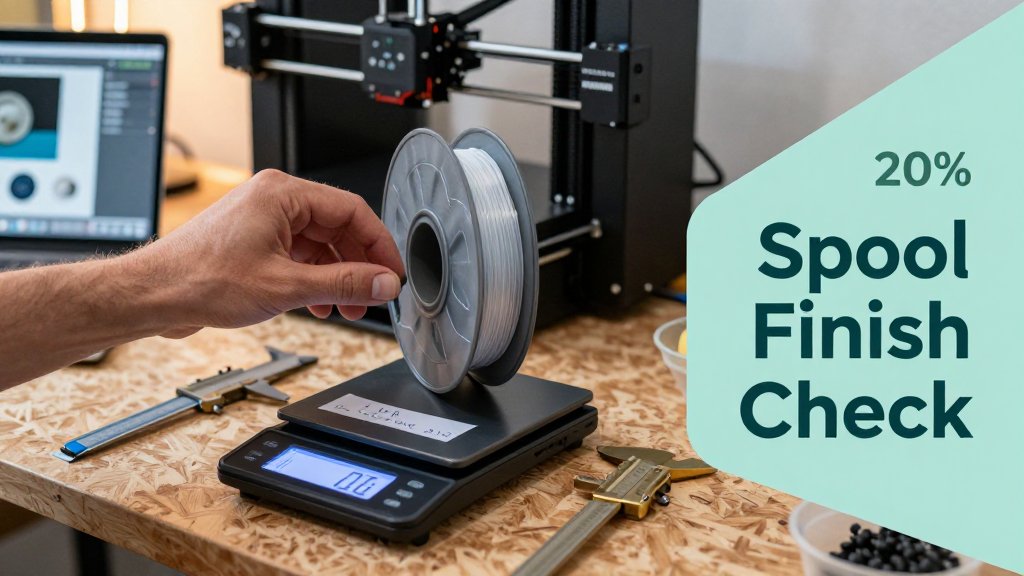
You only need two numbers to avoid the classic 3D printing heartbreak of runout: (1) grams required by your slicer, and (2) grams left on the spool. Treat it like baking by weight or shipping by ounces, you do not need perfect precision, you need a reliable yes or no before you hit Print and walk away. Your slicer already gives you the first number in seconds. The real work is figuring out what you have left, especially when you do not own a dedicated filament scale. The good news is that you can get a solid estimate with simple math, a known empty-spool weight, or even a quick photo when you cannot weigh anything at all.
Most slicers will report filament usage as grams, meters, or both, and either unit works as long as you stay consistent from start to finish. Weight is convenient because spools are sold as “1 kg” or “750 g” and your brain already thinks in grams. Length can be even more direct because a meter is a meter, while grams depend on density and your filament profile settings. The mistake that bites people most often is mixing up net filament weight with gross spool weight. A “1 kg spool” almost always means 1000 g of filament only, not the plastic spool plus filament. Empty spools commonly land in the roughly 150 g to 300 g range, so confusing net and gross can easily swing your estimate by a full snack-sized print.
The 30-second check: grams needed vs grams left
If grams left is at least 1.2x your slicer estimate, you are usually safe. That 20% buffer is not paranoia, it is insurance against the little things slicers cannot predict perfectly. Think purge lines and priming, extra skirt or brim, support tweaks, retractions that add up over thousands of moves, a last-minute infill bump, or slight diameter tolerance that changes how much plastic actually gets pushed. Even humidity and a bit of under-extrusion tuning can nudge real usage around. For long prints you want to sleep through, the buffer matters more than the exactness of any single number.
Here is a concrete example: your slicer says a kitchen container (say, a 1.2 liter dry-goods bin for flour or dog treats) will use 180 g of PLA. Multiply 180 g by 1.2 and you get 216 g, so you want roughly 215 g to 220 g left on the spool to feel relaxed. If you are sitting at 190 g left, it might still finish, but you are betting the entire print on a thin margin. If your slicer shows 60 m instead of grams, the same rule applies. Aim for at least 1.2x the length remaining, for example 72 m left for a 60 m estimate, and do not mix meters on one side with grams on the other.
Two numbers prevent most mid-print surprises: slicer grams required and grams left on the spool. Give yourself a 20% cushion, then start the print. If either number is fuzzy, measure again before you commit overnight.
Three ways to estimate remaining filament without a filament scale
You can get “grams left” three practical ways, and you do not need a specialty filament scale for any of them. Method 1 (spool label math) can be very accurate if you actually subtract what you print. Method 2 (empty-spool weight subtraction) is fast and usually accurate enough for any go or no-go decision, as long as your empty-spool number is right. Method 3 (photo-based estimate) is the backup plan for when you cannot weigh anything, like you are at a makerspace with no scale, or the printer is already mounted in a tight enclosure. Photo estimates are best used as a quick sanity check, not a billing-grade measurement.
Spool label math is simple if you keep even a basic log. Example: you opened a new 1 kg spool, then you printed three jobs your slicer reported as 120 g, 85 g, and 60 g. You have used about 265 g, so you have about 735 g left (before adding your safety buffer check). Empty-spool subtraction is even easier for most people: weigh the current spool on any kitchen scale, then subtract the empty-spool weight (also called tare). The catch is that tare varies a lot by brand and spool style. MatterHackers maintains an empty spool weight table that shows examples ranging from about 173 g to about 319 g for common 1 kg spools, which is exactly why guessing the tare can fail you on tight prints.
Photo-based estimation is the “I need an answer now” option. If you can see the spool face, a good photo can tell you whether the remaining filament looks like a thin ring, a half spool, or almost full, which is often enough to decide if you should swap spools before starting a 6 hour print. Scale for Grams can help here because it is built for fast, practical weight estimates from photos on iOS, the same way a home baker estimates flour portions or a small seller estimates package weight. If you already use photo estimates for everyday measuring, you will feel at home, and you can also compare your approach with palm-based macro tracking to get better at consistent visual sizing. For filament, treat the photo result as a confidence check, then add a generous buffer if you are close.
Convert filament grams to meters reliably
If you only know “I have about 120 g left,” you can still make a solid go-or-no-go decision by converting grams to meters. The key idea is simple: meters depend on two things, your filament diameter and your material density. Diameter controls the cross-sectional area of the filament, and density (in g/cm3) converts that volume into mass. For a quick check before a long print, you do not need lab-grade precision, but you do need a consistent method and a safety buffer so you do not run out at 97 percent. (If you are estimating remaining spool weight from a photo using Scale for Grams, this math is what turns that estimated grams into an estimated “meters left.”)
Quick numbers for 1.75 mm filament weight per meter
For 1.75 mm PLA, 1 meter is roughly 3.0 g. As a sanity-check range, PLA is usually about 2.9 to 3.1 g per meter, PETG about 3.2 to 3.4 g per meter, and ABS about 2.9 to 3.1 g per meter (depending on blend and fillers). Those are intentionally “planning numbers,” not a promise. They are good enough for real decisions like: you estimate 120 g left, your slicer estimates a 35 m job, and you want to know if it is safe to start. With PLA at 3.0 g/m, 120 g is about 40 m, so you likely clear 35 m with room for a skirt, purge line, and a few retries.
The densities underneath those estimates are what make them reusable. Typical “plain” densities are about 1.24 g/cm3 for PLA, about 1.27 g/cm3 for PETG, and about 1.01 g/cm3 for ABS, as summarized in common filament densities. If you do the pure geometry math with an exact 1.75 mm filament, PLA lands very close to 3.0 g/m and PETG lands a bit over 3.0 g/m. The reason many makers still plan PETG at 3.2 to 3.4 g/m is that it bakes in real-world variability, like slightly oversized diameter and additive-heavy blends that behave “heavier per meter” than the textbook value.
The simple formula (and the common mistake)
Here is the formula in plain words: mass per length equals density times cross-sectional area times length. Filament is basically a long cylinder, so the cross-sectional area is pi times radius squared. For 1.75 mm filament, the radius is 0.875 mm and the area is about 2.405 mm2. That one number is handy because it stays the same for every material if your diameter is truly 1.75 mm. Once you have area, you can compute volume for any length (area times length), then multiply by density to get grams. Flip it around and you can solve for meters left from grams left.
The most common mistake is mixing units. Density is usually given in g/cm3, but your filament diameter is in mm, and your slicer might show volume in mm3. If you forget the conversions, you can be off by about 10x and still feel “close” because the numbers look reasonable. A practical workaround is to use your slicer’s volume output if it offers it in cm3: grams equals volume times density. Example: a slicer says the print uses 42 cm3 of PLA. Using 1.24 g/cm3, that is about 52 g. If your slicer only shows mm3, remember 1,000 mm3 equals 1 cm3, so divide by 1,000 before multiplying by density.
Why brand-to-brand variation happens (and how to pick a safety margin)
Two spools labeled “PLA 1.75 mm” can still differ enough to change your meters-left estimate. Diameter tolerance is the big one because area scales with diameter squared. If one brand runs at 1.70 mm and another at 1.80 mm, the 1.80 mm filament has about 12 percent more cross-sectional area, which means about 12 percent more grams per meter for the same material. That is the difference between a comfortable 40 m and a nervy 35 m from a “120 g remaining” estimate. Additives matter too: pigments, “silk” effects, metal-filled PLA, carbon fiber blends, and impact modifiers can nudge density up, while foaming agents (used in some “lightweight” filaments) do the opposite.
A simple safety margin keeps you from overthinking it. For short jobs, a 10 percent buffer is usually fine. For long prints (multi-hour, tall parts, anything that would be painful to restart), plan 15 to 25 percent. Concretely, if your slicer predicts 35 m of PETG and you are using the planning number of 3.3 g/m, that is about 116 g. With a 20 percent margin you want about 140 g available, not 116 g. If you only have a rough estimate like “somewhere around 120 g,” treat it as a maybe and either swap to a fuller spool or redesign the print to use less material. Conservative math feels boring, but it is cheaper than wasting 9 hours of machine time.
Estimate filament left from spool weight or photo
If your print is estimated at 185 g in the slicer and you are staring at a half-used spool, you do not need perfect math, you need a confident go or no-go call. Two workflows cover almost every real situation. Workflow A uses any kitchen scale, even a cheap one that reads to 1 g, and it is accurate enough to trust for overnight prints. Workflow B is for the real world when you are at a friend’s printer, at a maker space, or you simply cannot weigh the spool right now. In both cases, build in a buffer, because purge lines, priming, retractions, and a slightly heavier filament blend can easily eat an extra 10% on top of the slicer estimate.
Workflow A: subtract empty spool weight (most accurate)
Step 1 is simple: put the spool on a kitchen scale and record the gross weight (spool plus filament). Step 2 is the only part people get wrong: you must subtract the empty spool weight (tare). Light plastic spools are often about 180 to 280 g. Wider, beefier spools can be 300 g or more. Cardboard spools vary a lot, and a 50 g difference is normal. Example: your scale reads 742 g, and you know your empty spool is 240 g. Filament left is 742 minus 240, which is 502 g. If your slicer says the job needs 410 g of PLA, you are probably safe if you still add a buffer.
Finding tare when you do not already know it is the whole trick. First, check the spool itself. Some brands mold the empty spool weight into the plastic or print it on the label, and some include it on the product page. If you have another empty spool of the same brand and style, weigh that and treat it as your tare, even if color differs. If you have no match, use a conservative estimate, for example assume 280 to 320 g for a chunky plastic spool, then decide with a bigger buffer. Best habit: when you finish a spool, weigh the empty spool and write “TARE 236 g” on the rim with a marker so future-you can subtract in seconds.
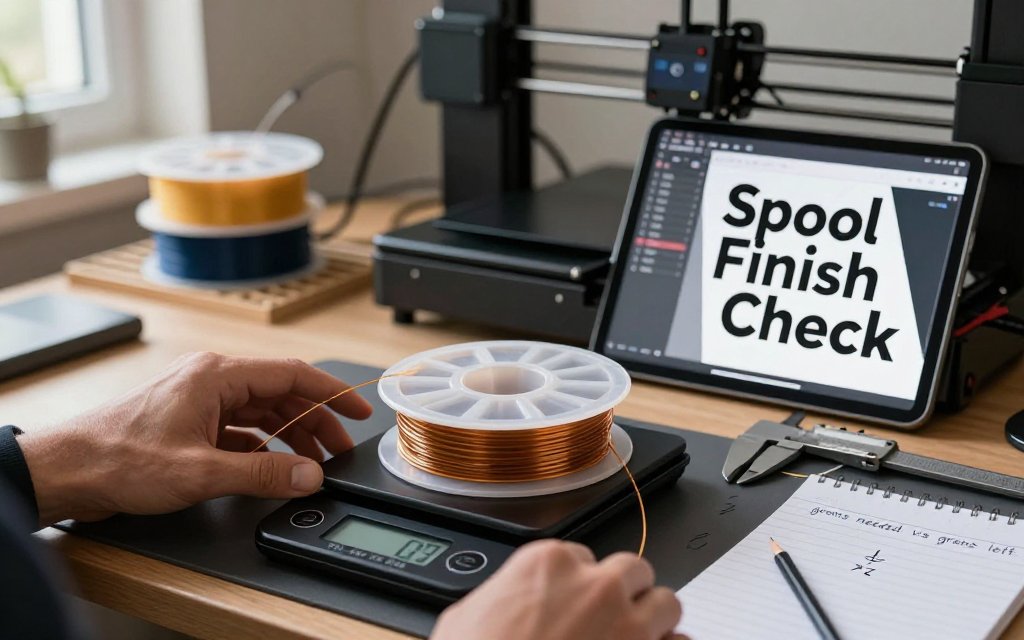
Workflow B: photo-based estimation when you do not have a scale
Photo estimation is basically a volume guess: how thick is the remaining “ring” of filament compared to a full spool, and how much of that ring is taken up by the hub in the middle. A nearly full 1 kg spool usually looks like a thick donut with a small center hole. As you run low, that donut turns into a thin band hugging the hub. If you know the spool type (for example a common 1 kg, 1.75 mm spool with standard flange size), you can compare what you see to a reference photo of a full spool and estimate a rough percent left, like 30% left (about 300 g) or 15% left (about 150 g).
To get a usable photo, shoot straight-on so the spool is a clean circle, not an oval. Keep the full spool outline in frame so the app can understand size, and avoid wide-angle distortion (back up a little and zoom in if you can). Use even lighting so the edge of the filament is easy to see, especially with black PETG or dark PLA where shadows hide the true thickness. Scale for Grams can help you estimate remaining weight from a photo for a quick decision on iOS, then treat that number as a checkpoint, not a guarantee. For a long print, add a safety buffer of 10% to 25%. If you think you have 260 g left and the slicer says 240 g, that is a “no-go” unless you can reduce infill, split the model, or swap spools mid-print.
FAQ: How do I tell filament left without a scale?
Use a two-step cross-check. First, slice the model and write down the slicer’s filament estimate in grams and meters (example: 128 g, 43 m). Second, do a photo check of the spool and compare it to any known reference, such as a new spool photo of the same brand, or another spool you know is about half full. A practical fallback: if the remaining filament ring looks thinner than the flange depth (the side wall height), you may be under 200 to 300 g on many 1 kg spools, but it depends on the hub and flange. If you are close, lower infill from 20% to 12%, reduce perimeters, or split the print to reduce risk.
FAQ: What is PLA filament density in g/cm3?
PLA is commonly about 1.20 to 1.27 g/cm3, with many standard PLAs landing around 1.24 to 1.25 g/cm3 (see a typical PLA density datasheet). It varies with pigments and fillers, like wood-fill, carbon fiber blends, glow powders, and foaming PLA that is intentionally lighter. Do-this-now tip: if your slicer shows volume in cm3, multiply volume by density to estimate grams. Example: 96 cm3 times 1.24 is about 119 g. Then add a 10% to 25% buffer before you commit to a long job.
FAQ: How much filament is 200 grams in meters (1.75 mm)?
A quick conversion you can quote: for 1.75 mm PLA at about 3.0 g per meter, 200 g is about 66 m (200 divided by 3.0). For 1.75 mm PETG at about 3.3 g per meter, 200 g is about 61 m. This is close enough for planning, even if your exact brand is slightly heavier or lighter. Practical warning: if your slicer says the job needs 60 m on paper, do not start with exactly 60 m remaining. Aim for 70 to 75 m to cover priming, purge lines, small slicer differences, and the chance that your spool estimate was optimistic.
Need to weigh something fast, like a spool you are not sure will make it to the end? Download Scale for Grams and get an AI-powered weight estimate from a photo in seconds. It is a quick way to sanity-check your filament plan before committing to a long print. Grab it here: iOS, then try it on your next spool and print with more confidence.
Need to Weigh Something?
Download Scale for Grams and get an AI weight estimate from a photo in seconds.